cost of printing @ Shapeways

I had a really great question from a viewer on my YouTube channel yesterday on the flower eternity band tutorial—how much would it cost to have the ring printed and cast? There are several factors that can affect the overall cost, like the thickness of the band and the type of metal. I wear a similar band to this one, and mine is 1.5mm in thickness and it has never bent out of shape.

I’d only sent models out to Shapeways very early in my ZBrush exploration, and even then I’d only had waxes made. So I had no idea what the answer to this question was…so I created a new ring and got it ready for Shapeways. Mind you, there are other great services out there, but Shapeways has a large variety of materials available.

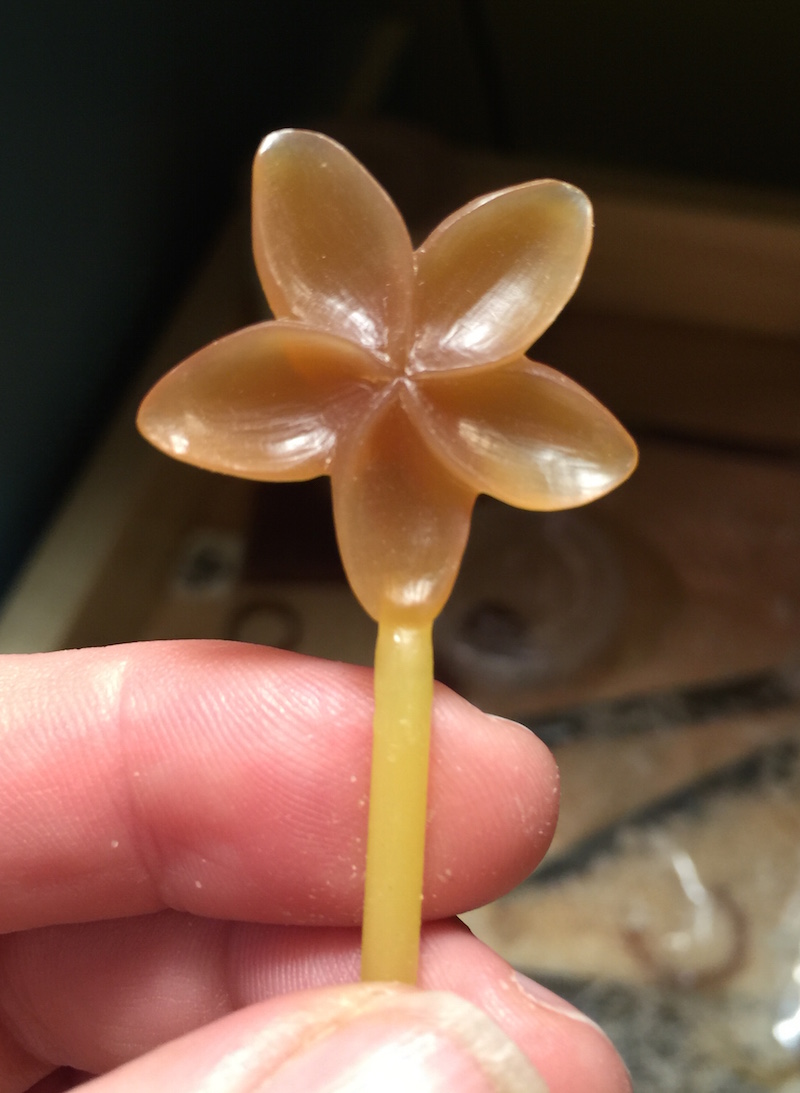
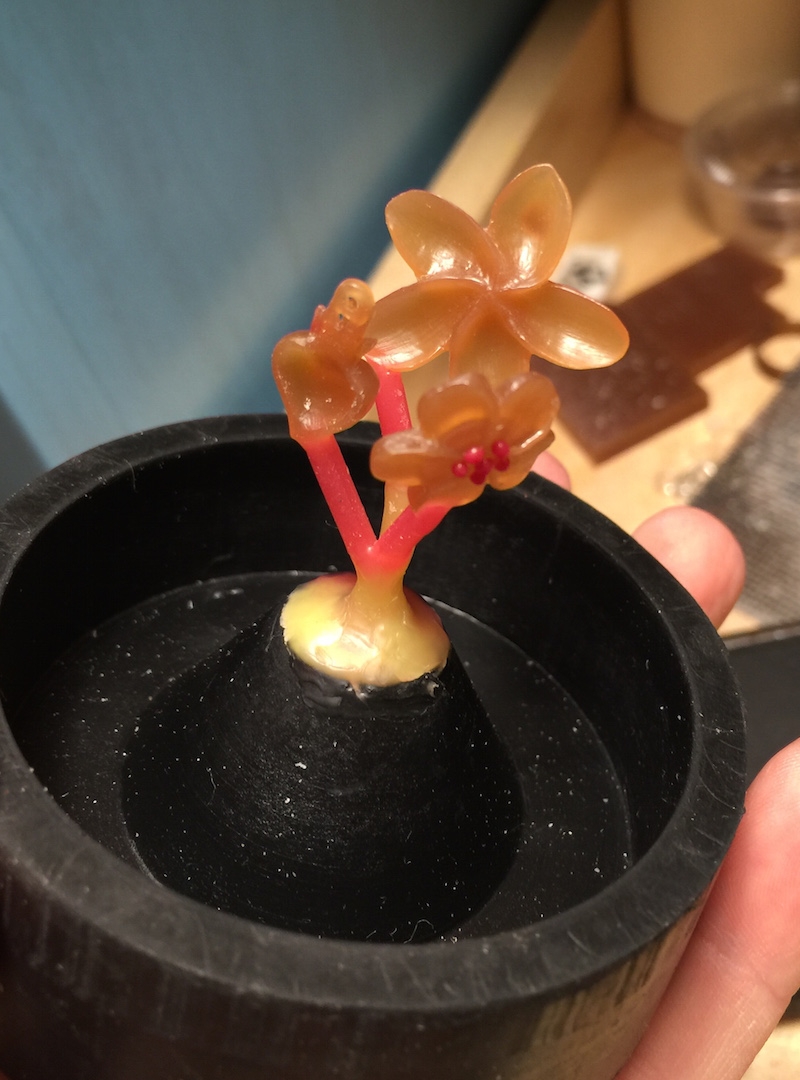
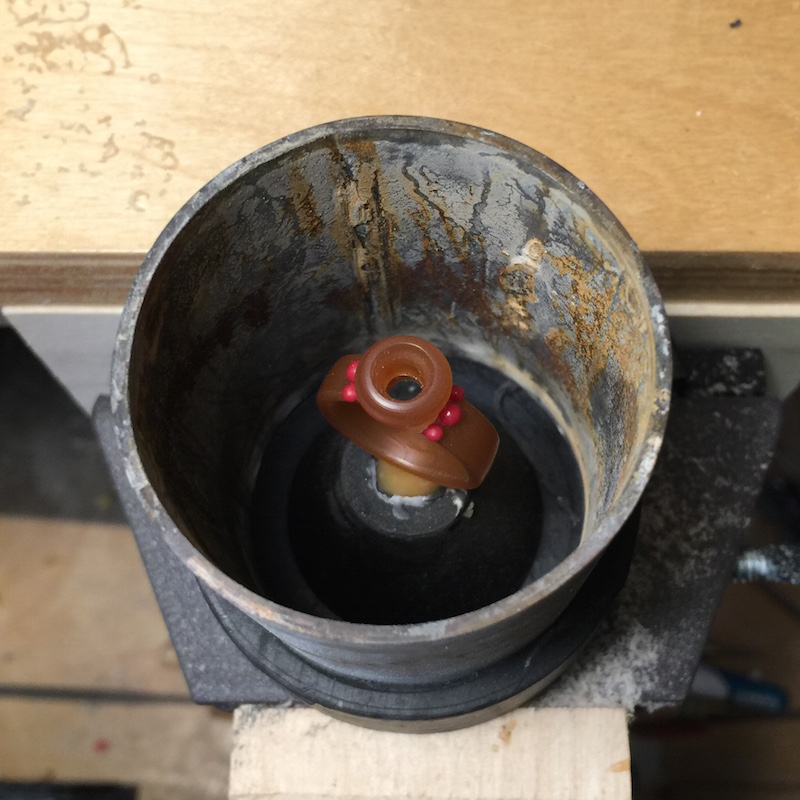
I decided to add a bezel setting to mine with a hole that’s smaller than the stone. I’ll use setting burs and a hammer handset on my Foredom to bezel set the stones. Creating a bezel with a smaller hole gives me flexibility on my stone size. Here are a couple photos of the model in ZBrush:

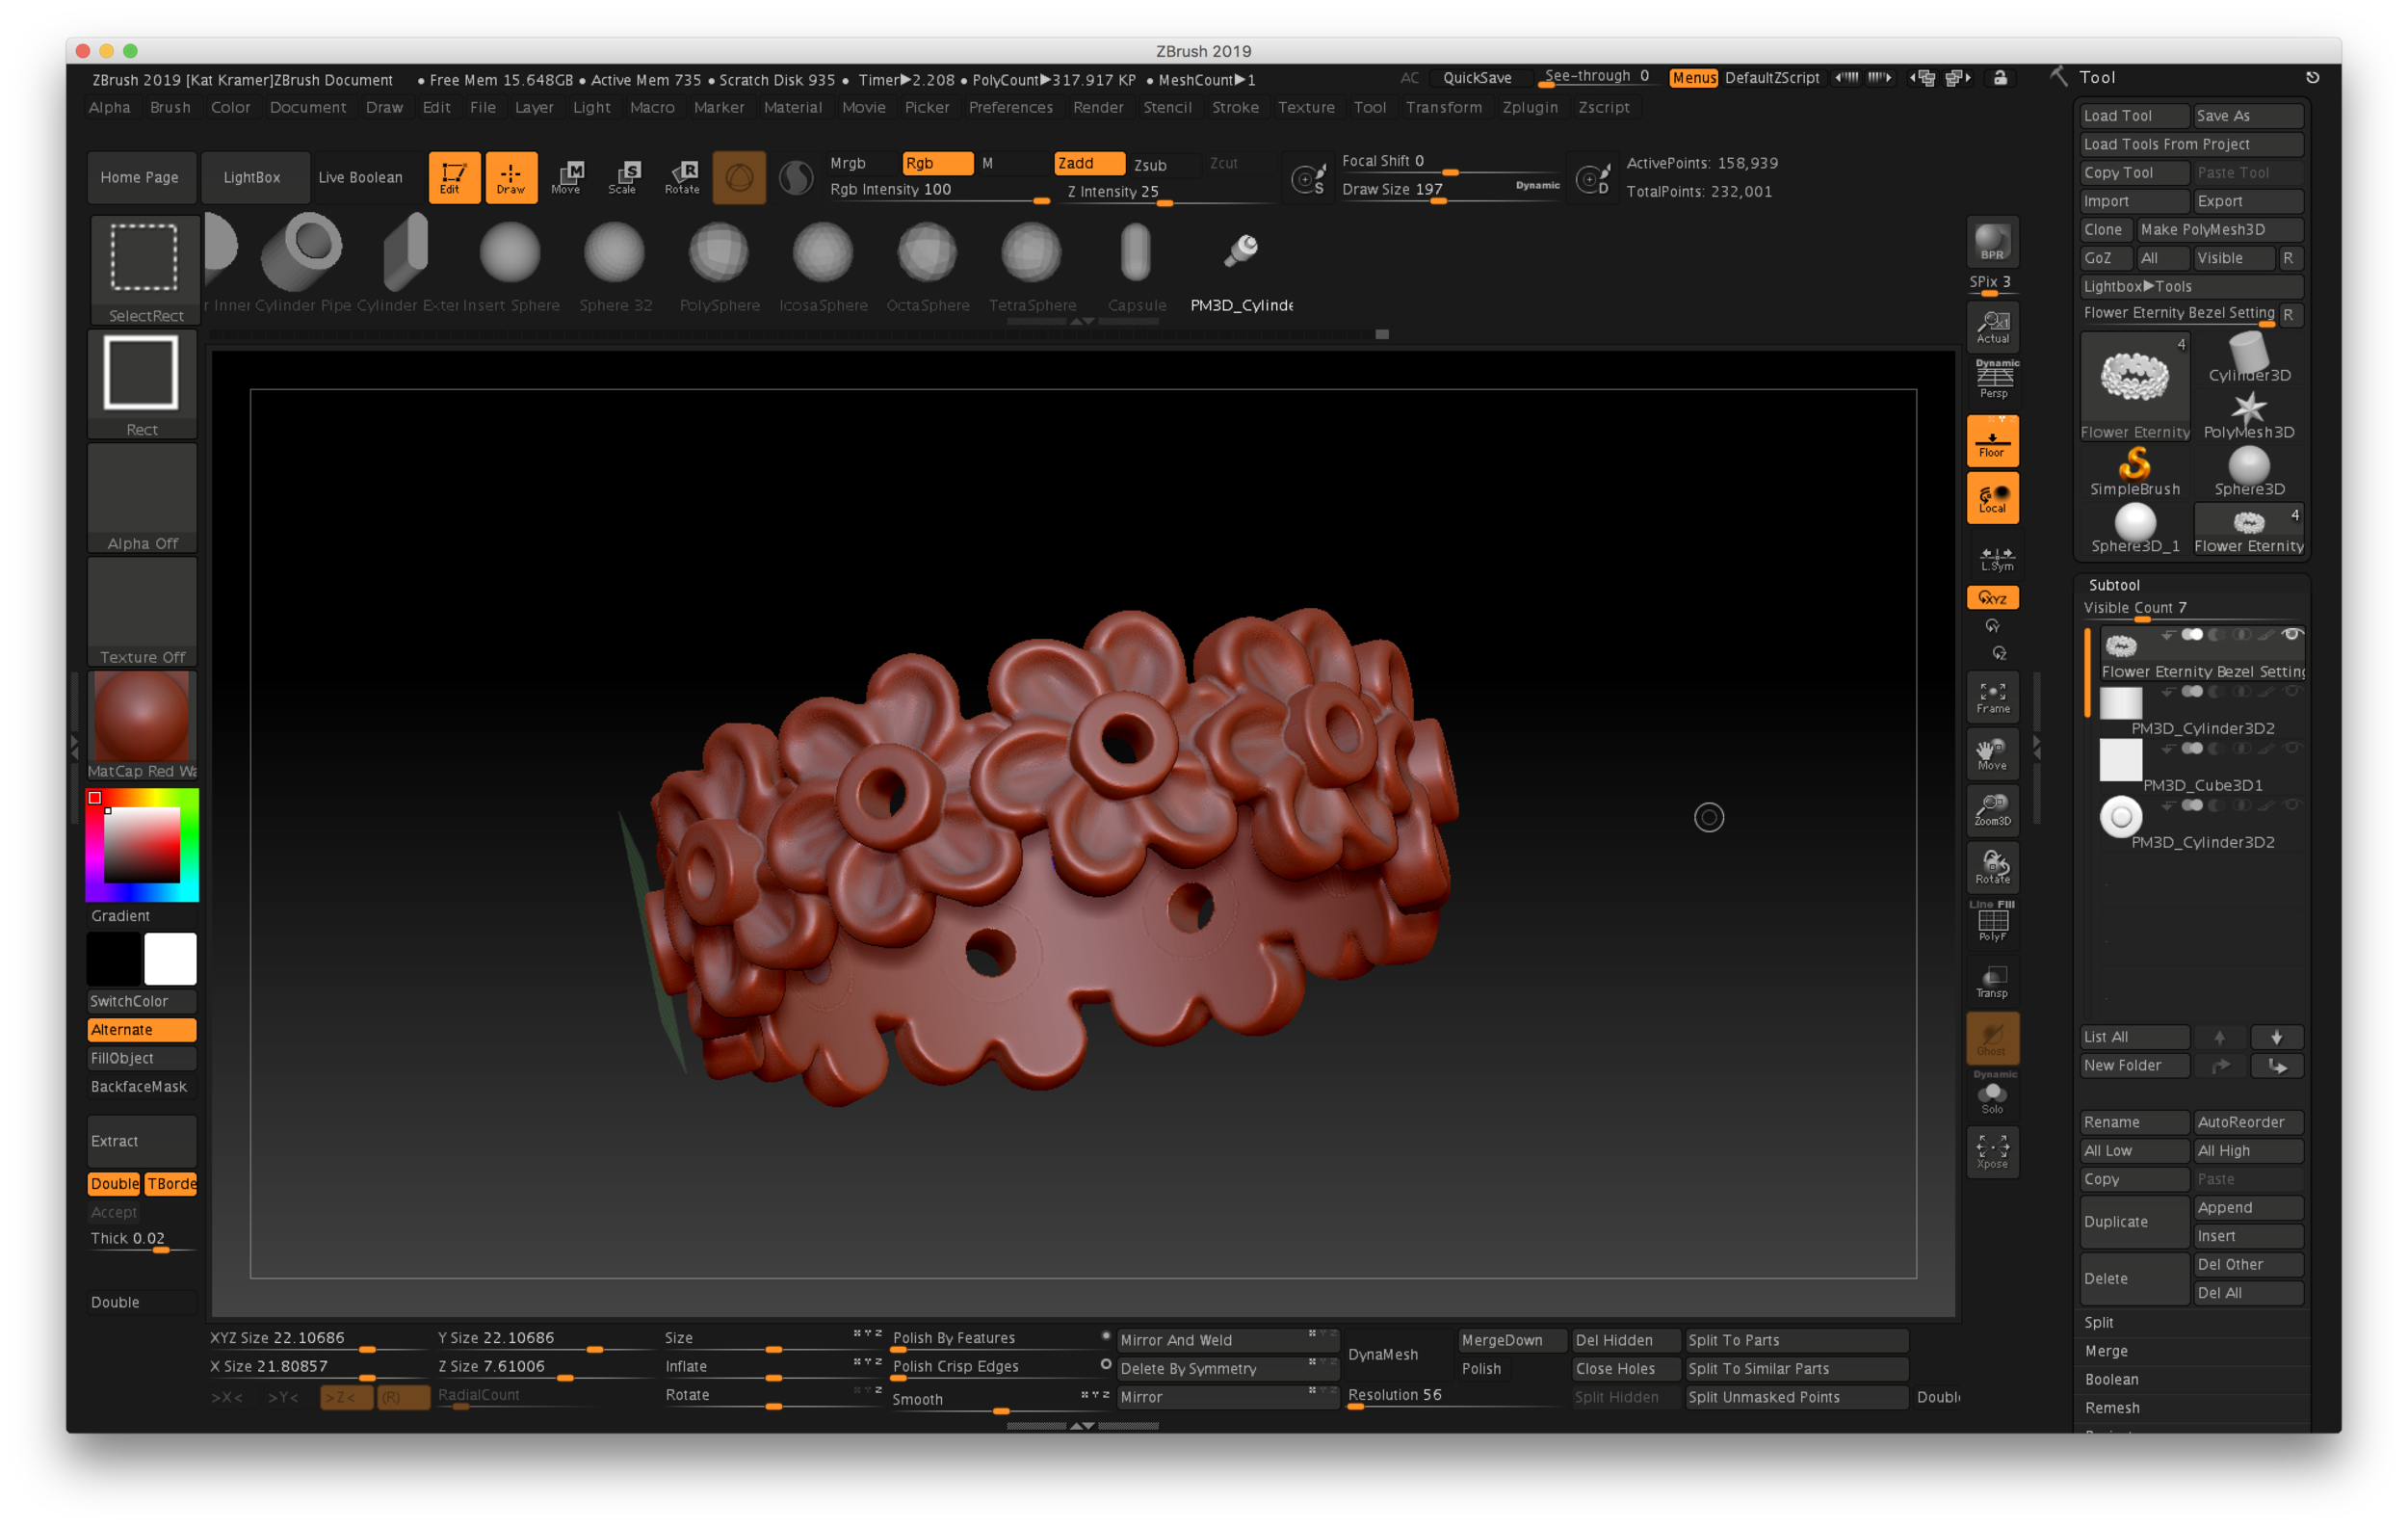
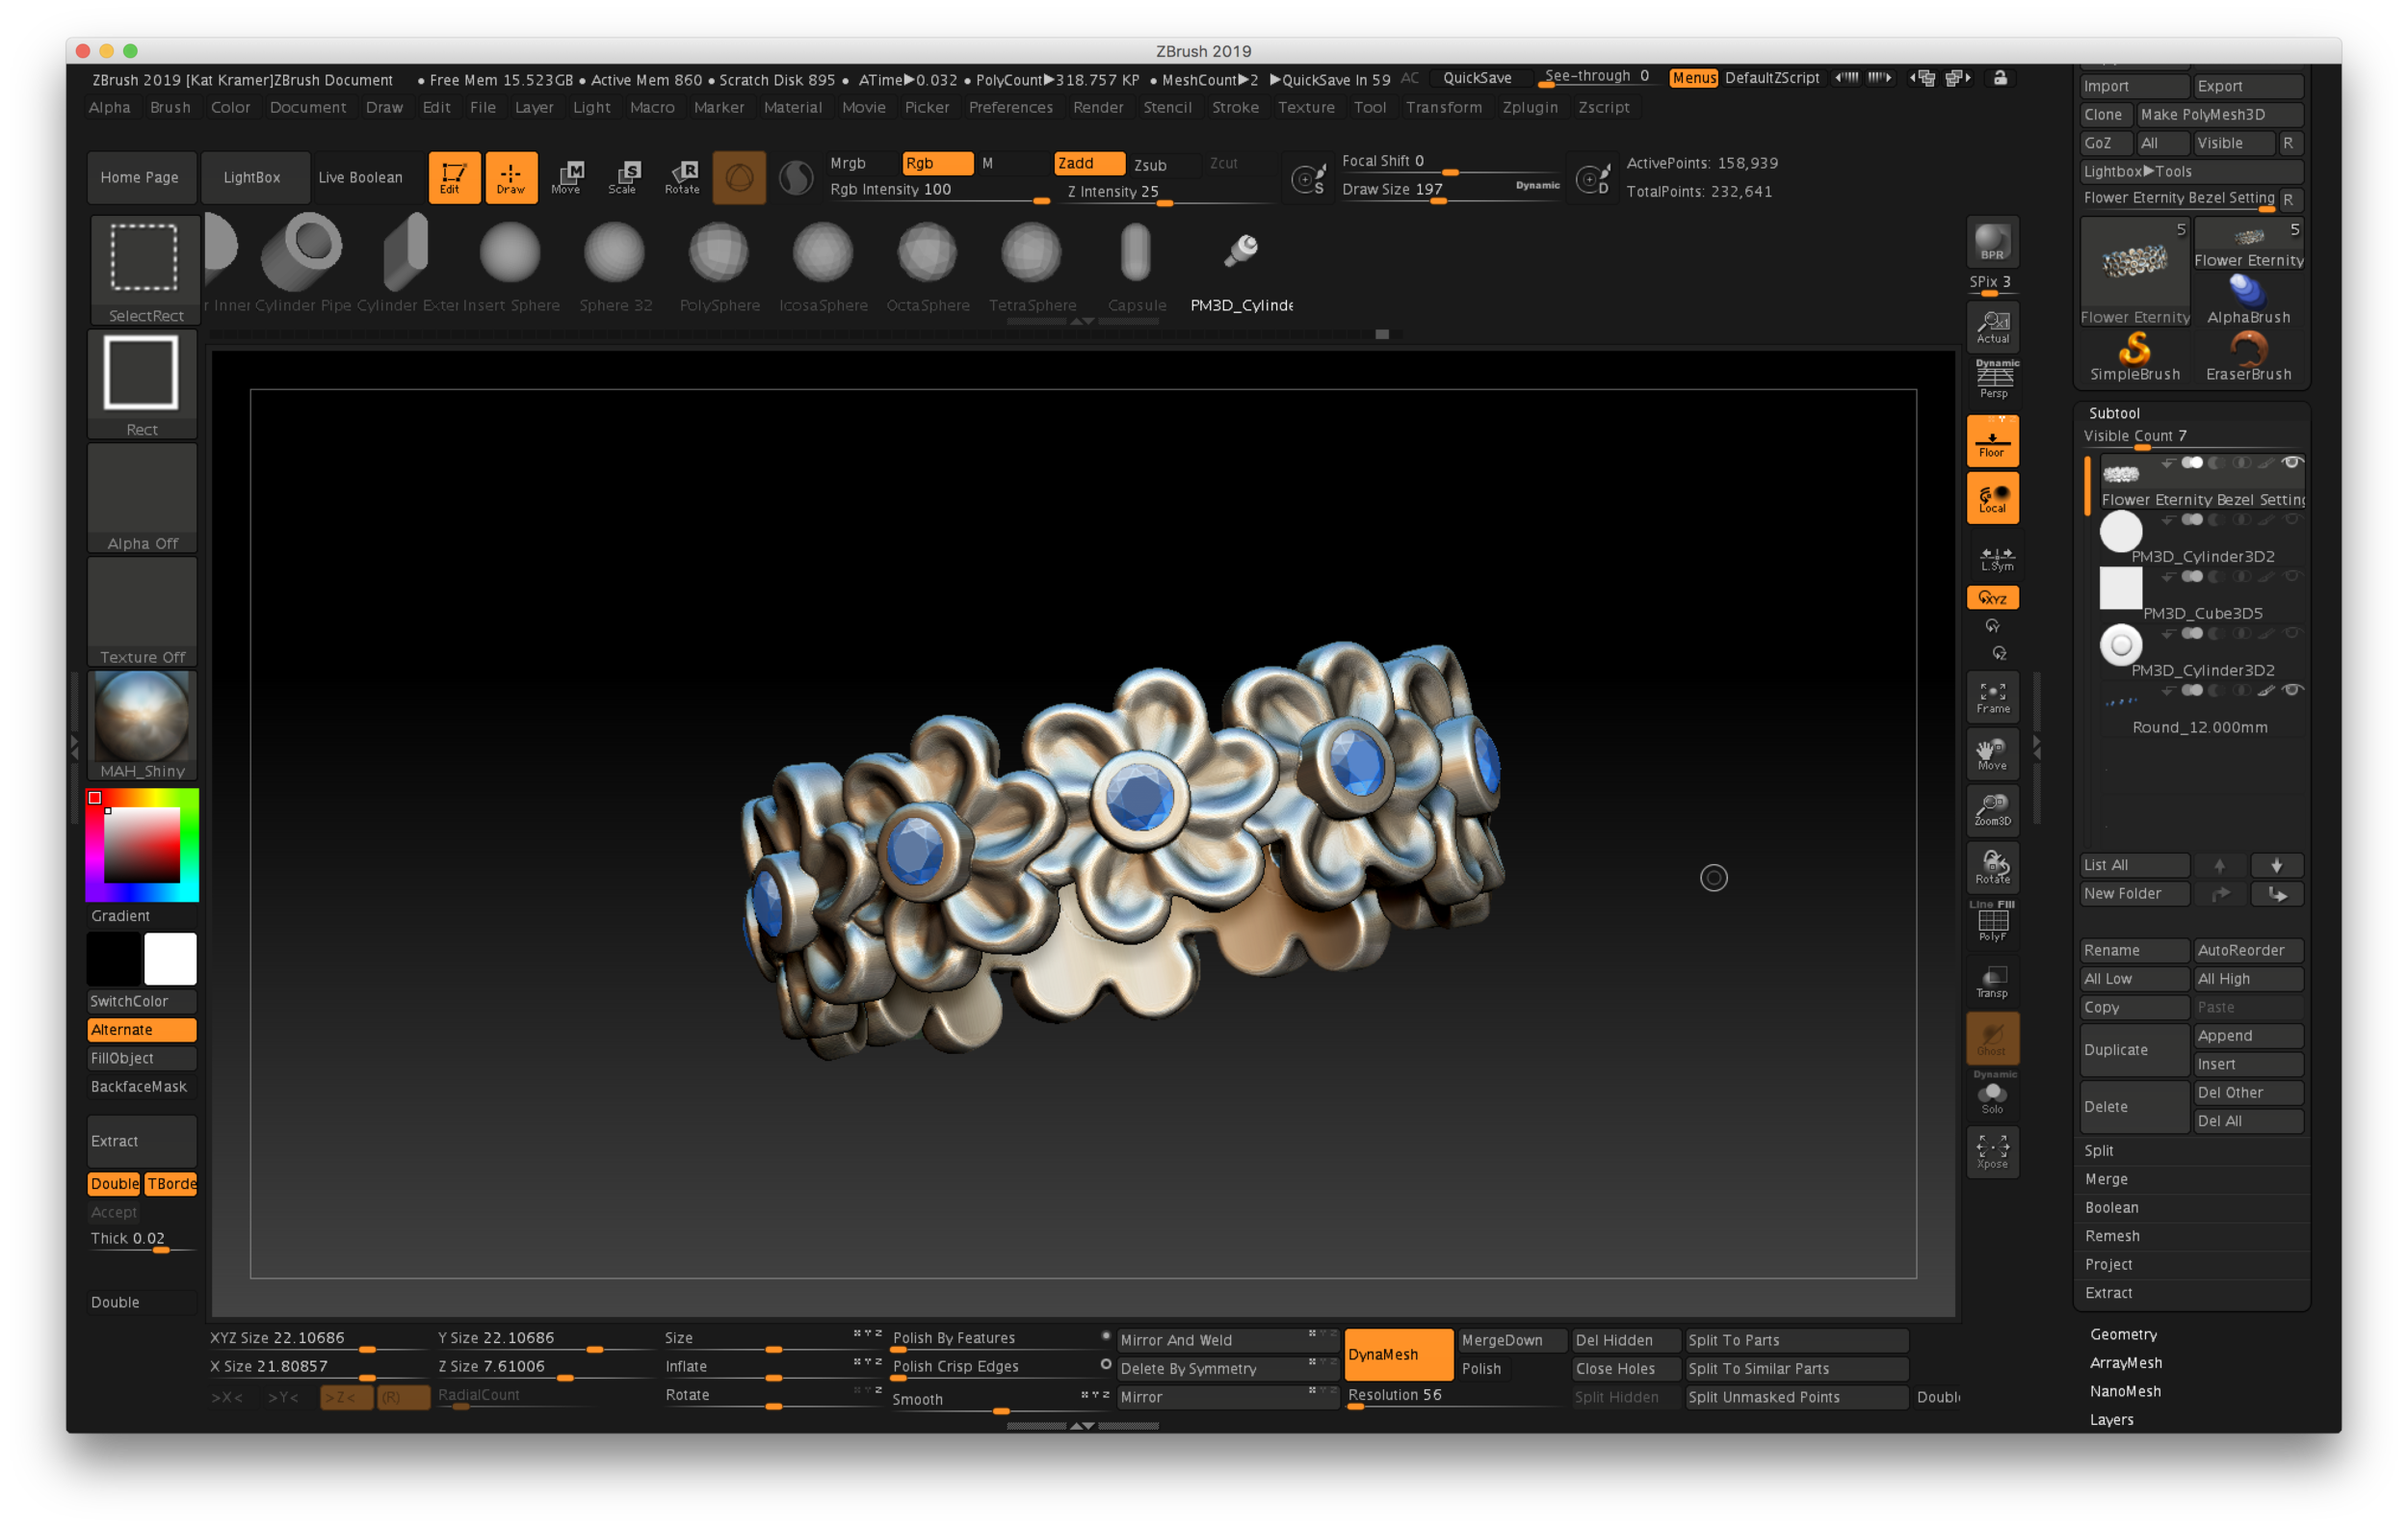
After creating the ring and resizing it to the desired thickness and ring size, I used Decimation Master to lower the overall file size and simplify the mesh. My ring is around a women’s size 8 US.

Make sure that the model you want to export is all in one Subtool—in my model, I had both the bezels and the flower band which needed to be permanently merged. I used Merge Down and re-Dynamesh to an appropriate resolution, which for full-sized rings in the method I use is a resolution of around 56-80. Then I went to the Plugins menu, and located Decimation Master. I always make a mental note of the ActivePoints above the canvas. Mine started out around 780,000 points.

This process has two steps…because you’re only exporting one Subtool, you only need to use Pre-process Current. That step will take a little bit of time, depending on the size of your model and number of ActivePoints. Once you’re done, the ActivePoint count will not change.

Special note about those ActivePoints: I tend to work with models that are a million points or lower…some artists have high-end hardware and love to work in the 12-20 million point range, but since I primarily work on a MacBook, and I hate waiting for my computer to process things, I learned how to work in lower resolutions.

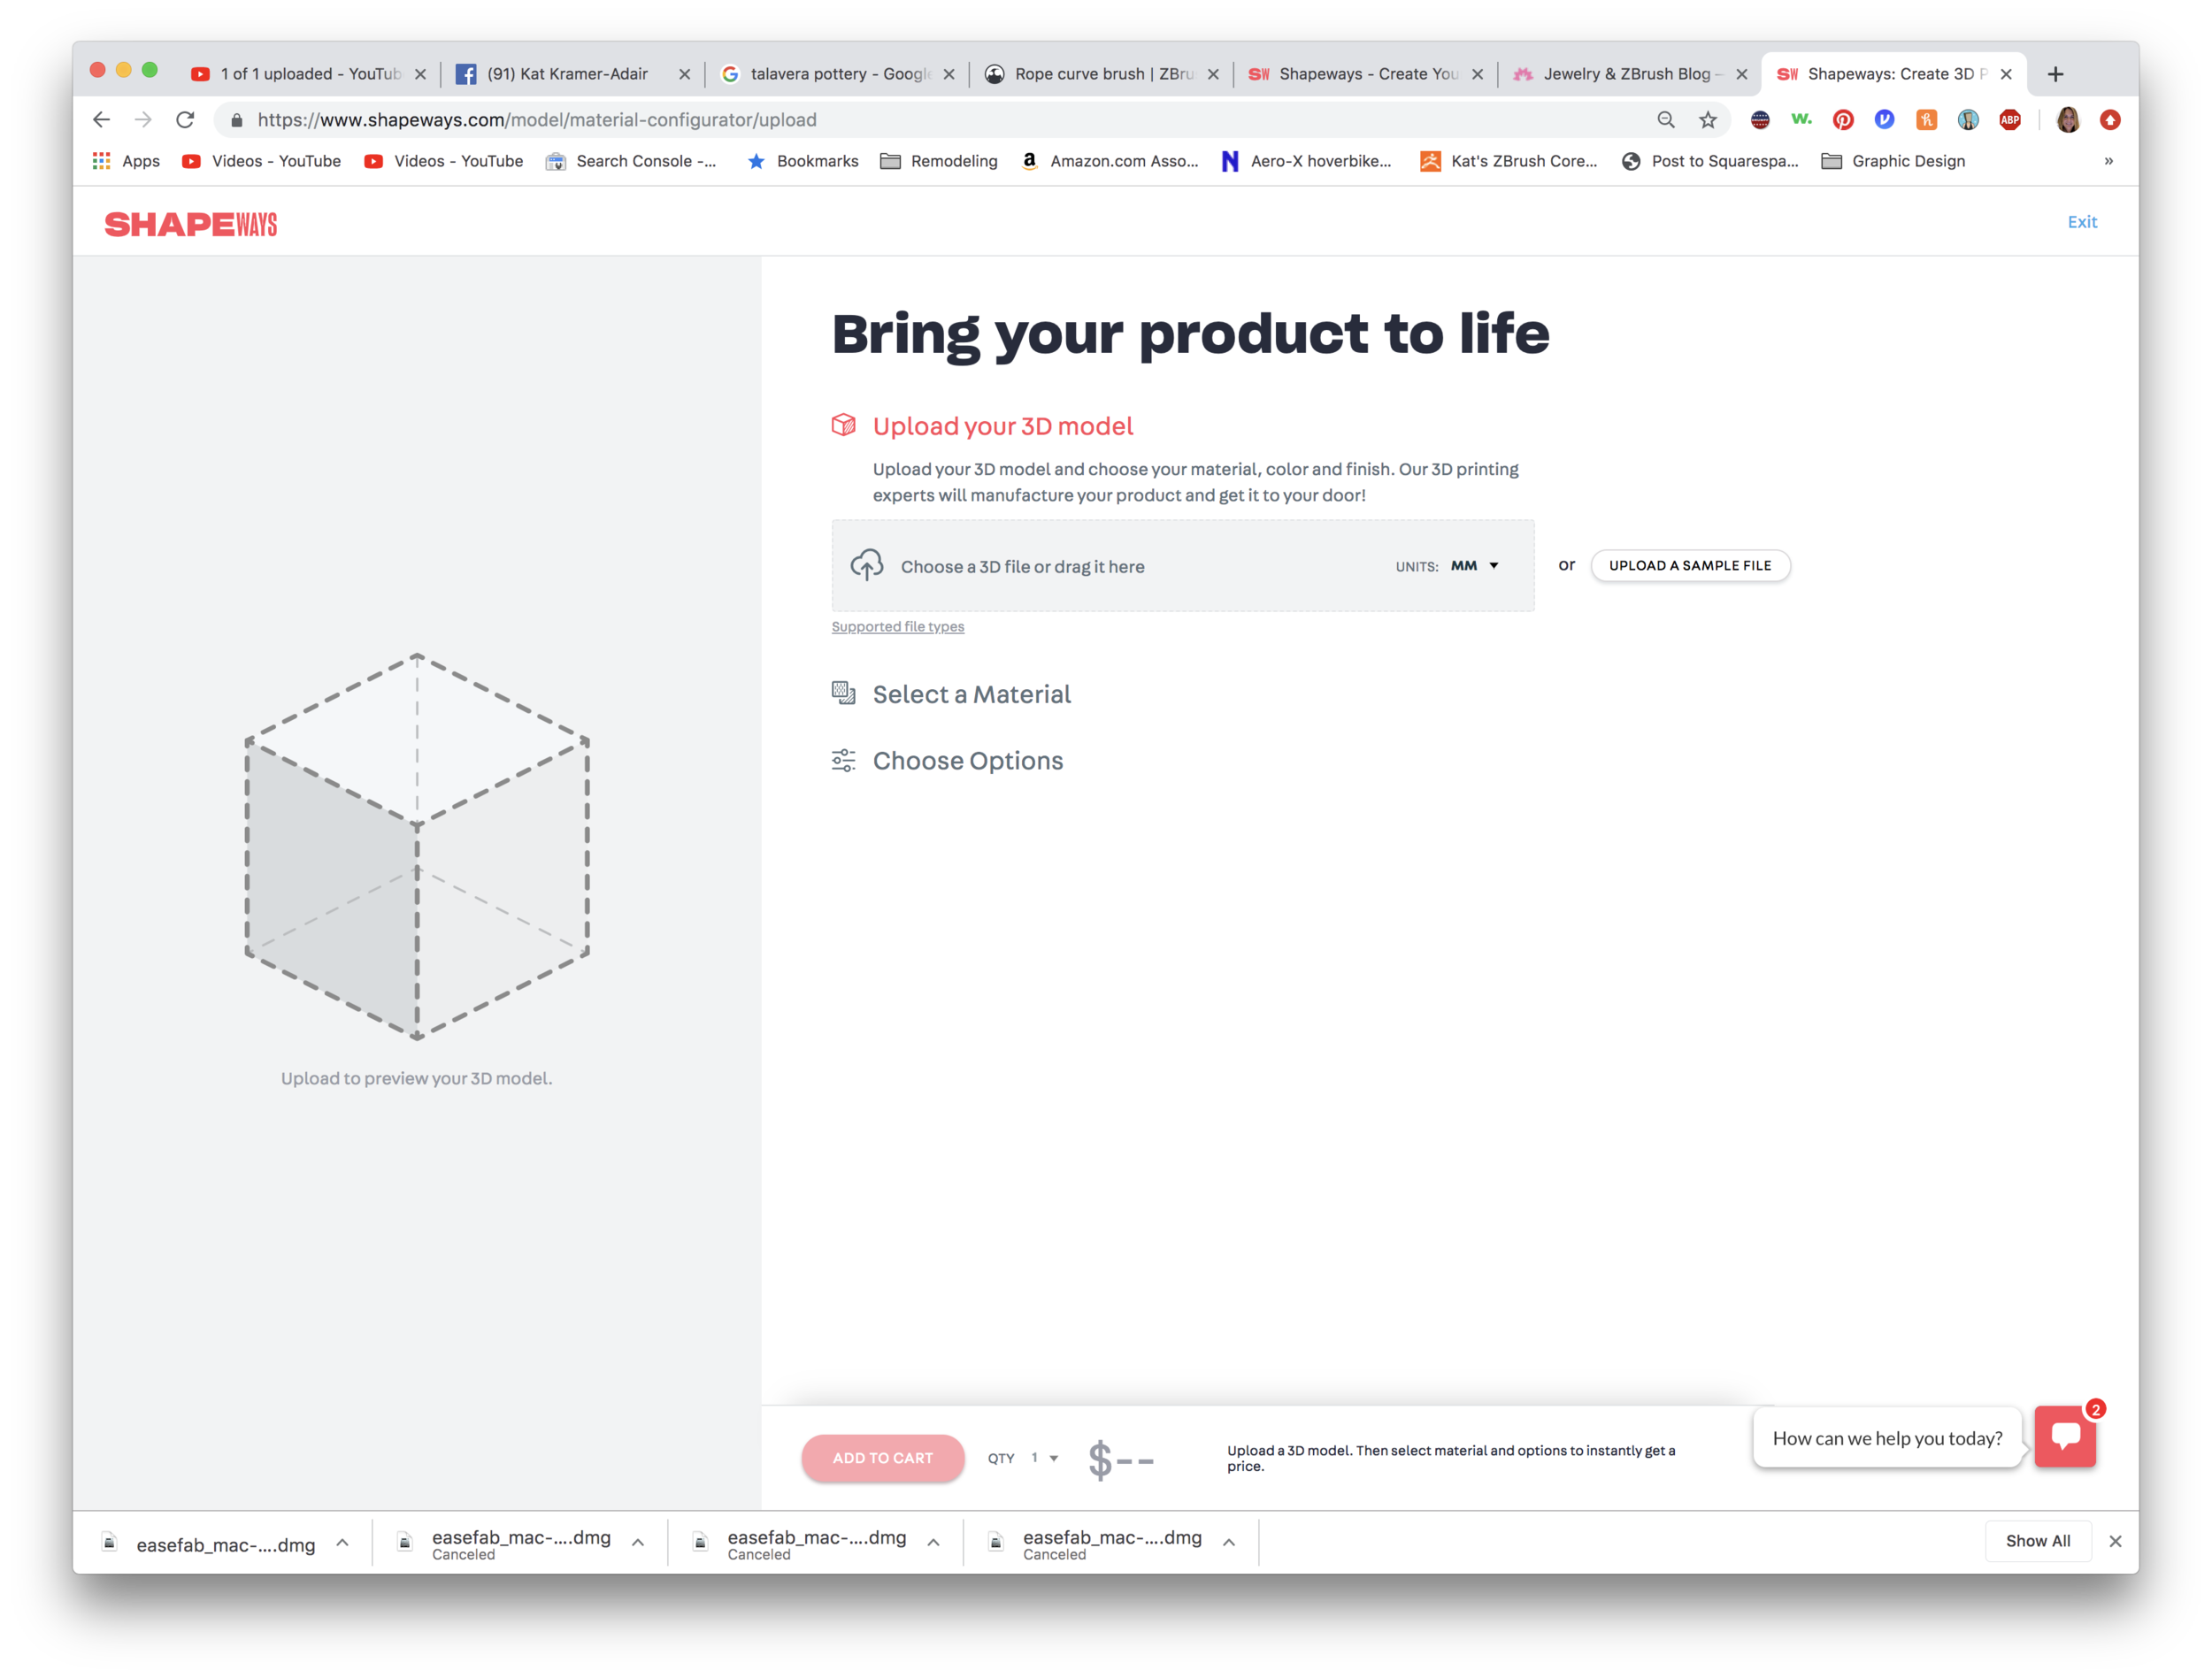
The second step is to Decimate Current, and this is when you will see a change in the ActivePoints. Once the operation was complete on my model, the ActivePoint count dropped down to 158,000, which is a smaller, more efficient file. It’s easily uploaded to Shapeways by using the Export command in the Tool palette.

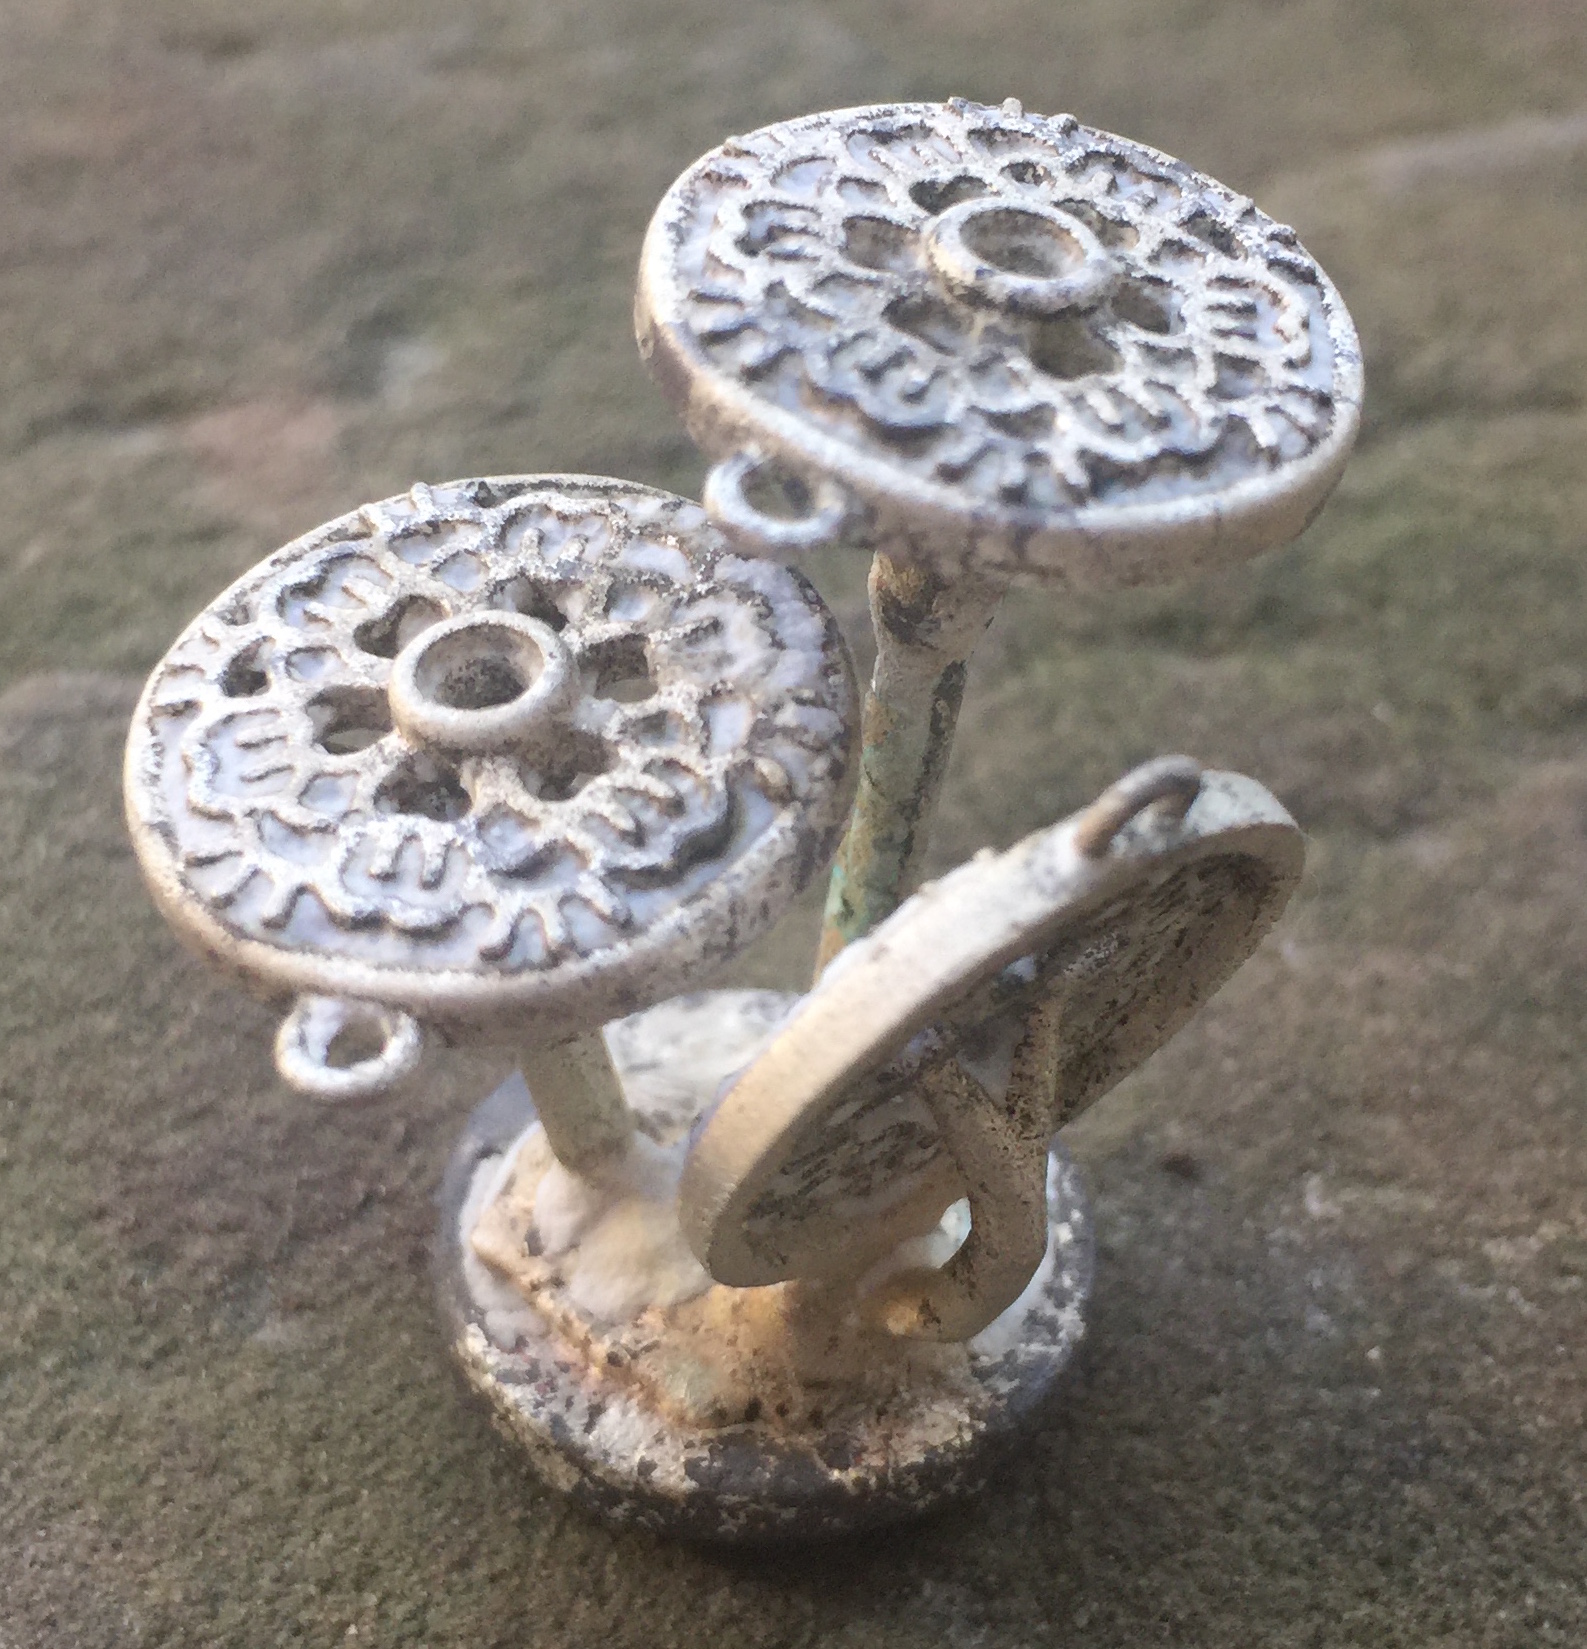
It looks like Shapeways has recently changed their landing page, so you can quickly upload a model and select a metal preference. You can also choose the type of finishing—rough, polished, or finely polished. There is an upcharge for those extras, though.

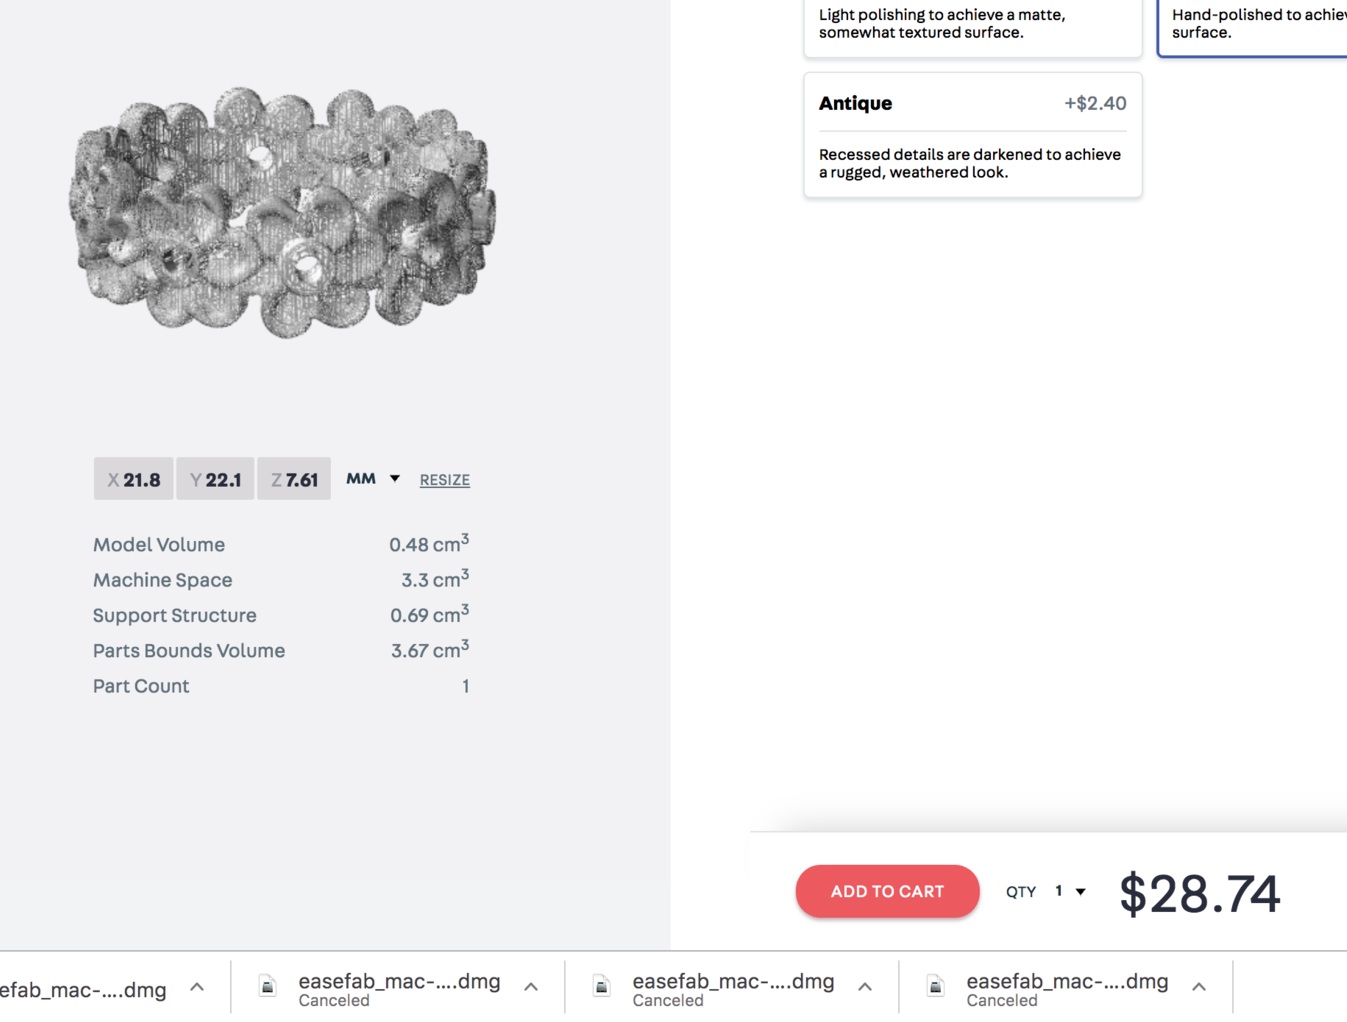
So the answer to the question if I were printing this design would be about $24-35 to print in sterling silver. Although I love wearing this ring so much I’d happily shell out $283 for a gold version!

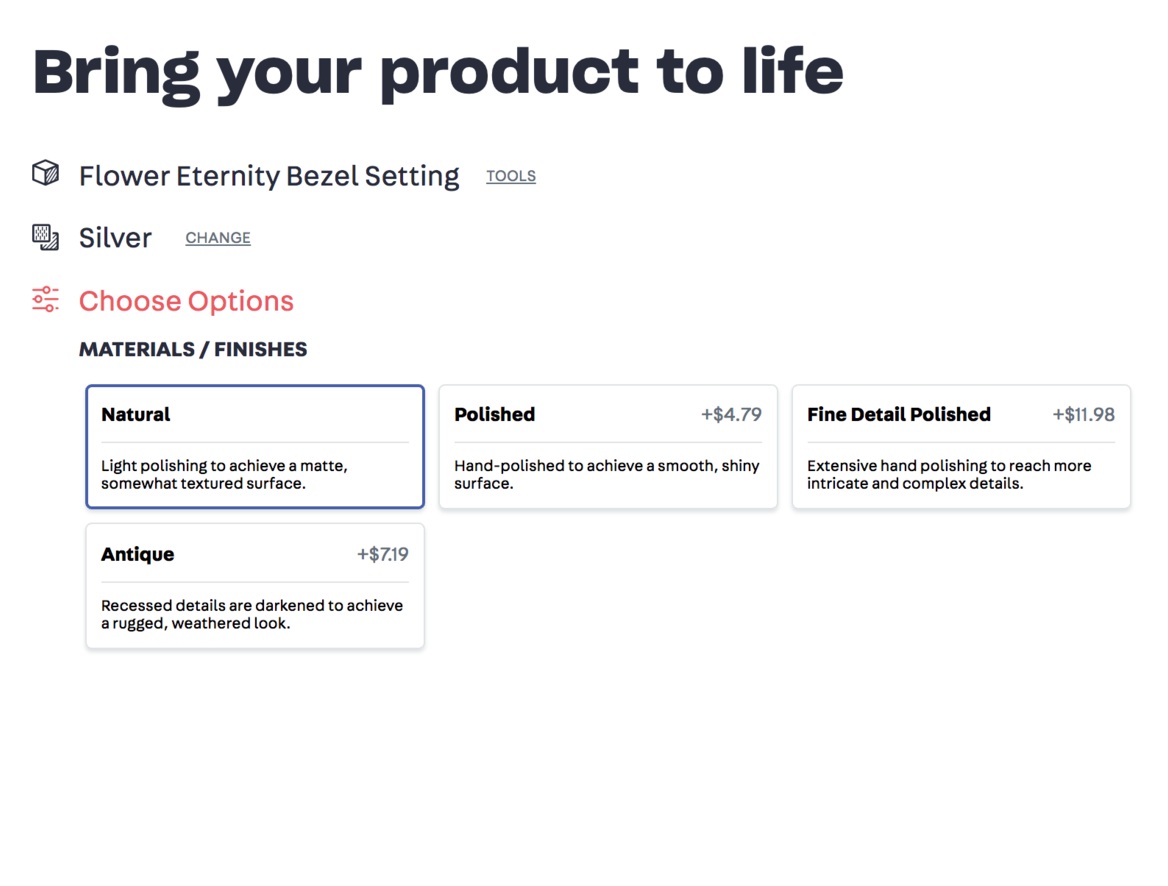
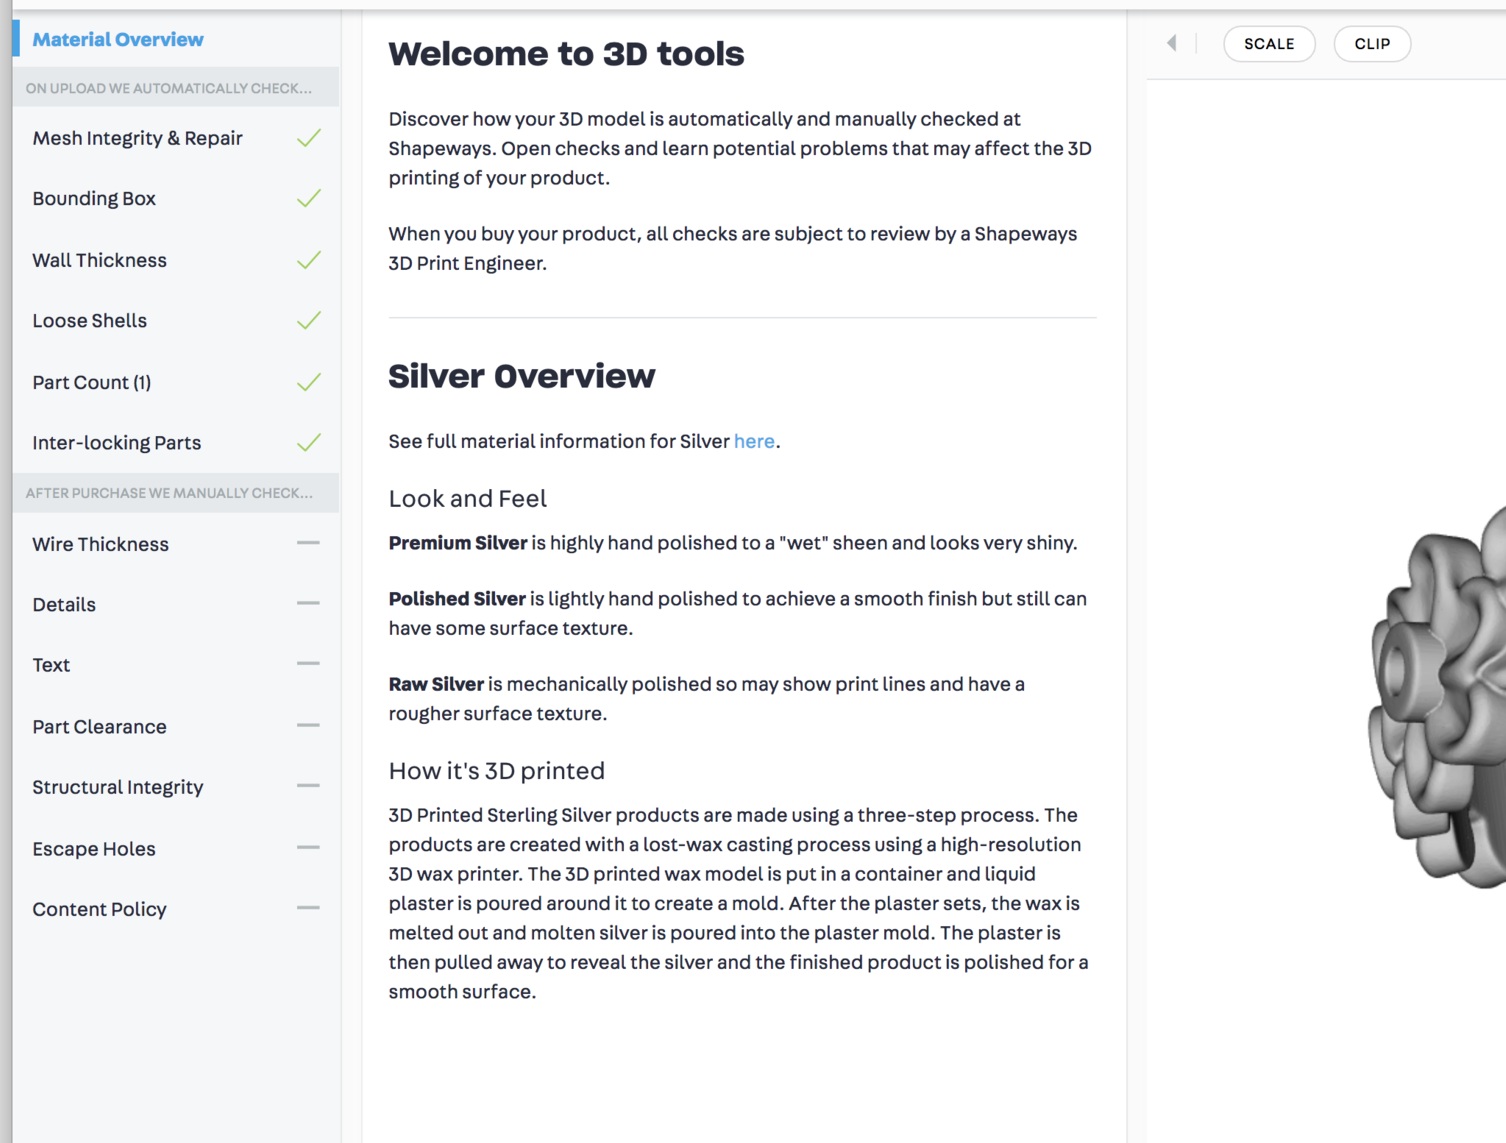
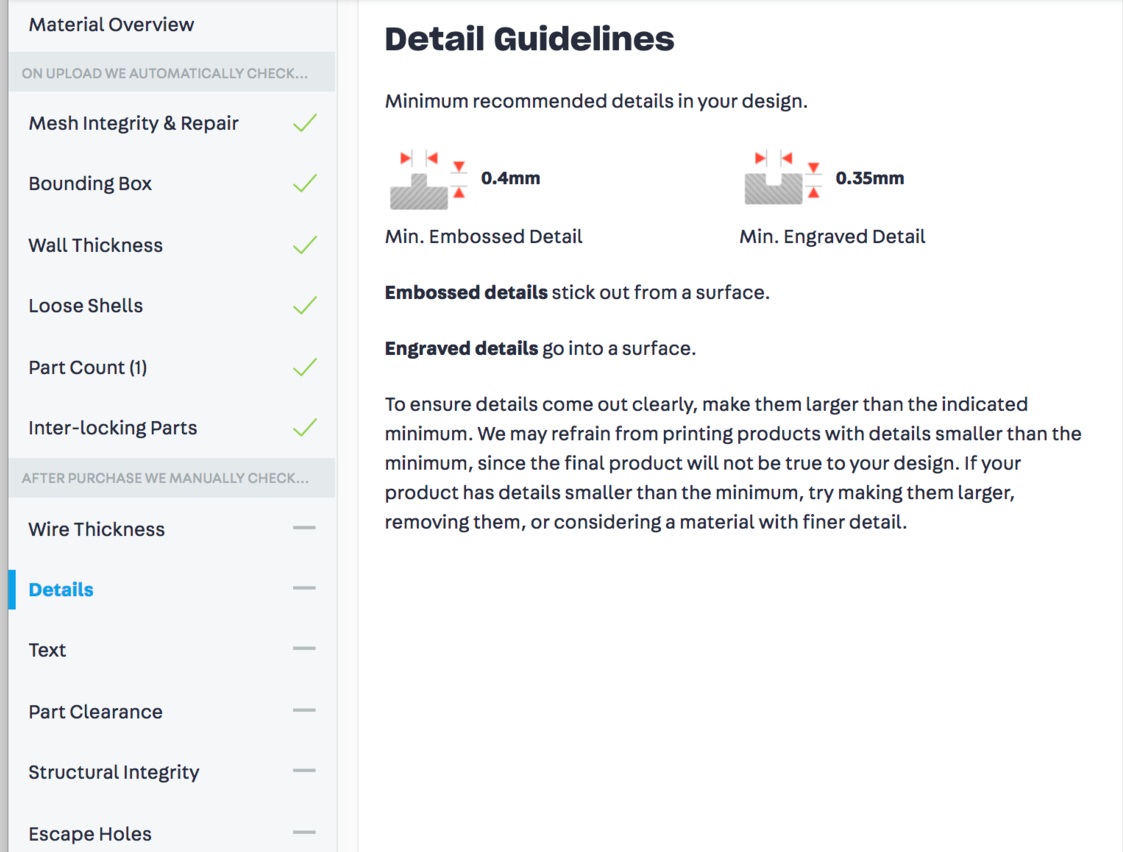
Also, there is another tool available. See below where it says TOOLS next to the title “Flower Eternity Bezel Setting?” If you click on that you’re directed to a 3D Tools page that will evaluate your model, and give information about the materials and printing.

Check out the images below, or you can click here to see the model for yourself!

finally casting...the mandala pendants

UPDATE, December 2017: Looking back at this post, there are so many things that are wrong! Anyway, a good exploration of what works and what doesn't, and modifying a design to cast and finish more easily. The main change I eventually made to this pendant is to attach the design to a backplate, so the design is simply raised from a background. With a patina, the design is similar but much easier to cast and finish. I have since scrapped this design and melted them all down. So maybe they'll be collector's items someday! And oh my goodness…thankfully my design skills have come a long way. I’ll leave this post up, though, just in case others are having the same issues.

Well, it's finally time. What better time to start casting holiday gifts than a week before Christmas?

It's been an interesting journey. It started back in Denver after I got the casting setup...I remember that my first attempt at casting with a perforated flask, I ran out of acetylene at 1 a.m. and didn't have a way to heat enough metal to cast. The second attempt, I realized that my acetylene/ambient air torch couldn't heat enough metal hot enough to cast. After switching to my old Smith Little Torch (acetylene/oxygen) with a "bud tip," I was able to get the metal melted, but never cast before we suddenly moved back to Texas.

Fast forward over a year. Since then I've taken the wax-working class with Kate Wolf, learned ZBrush, and explored printing in 3D on the Formlabs Form 2. I've printed a lot of things, but the missing link was casting them into metal jewelry.

So I was ready to go! Treed up some models, was burning them out, and my kiln fell victim to the outdoor sprinkler. Since I work late at night usually, I didn't realize that the sprinkler was scheduled to water the lawn that night. The kiln was sitting on a little window in the outdoor kitchen burning out my first 3D model flask, and a poorly aimed sprinkler doused the kiln and killed it. I awoke to an error message and a flask that hadn't completed burnout. I was crushed.

So what do you do when your Paragon SC2 kiln has been watered? Let it sit for a few days and let it dry out. Since this kiln has a metal cabinet, I removed the back and aimed the fan on the inside. Sure enough, about four days later I had the guts to turn it back on. It worked.

Next, I was ready to cast the 3D prints. I prepared the trees, the flask, and tried casting again. I was still having difficulty getting the metal heated correctly. About that time I was helping my parents downsize their house, and my dad gave me a little present...the Kerr Electro-Melt that I needed to get the metal to the right temperature for casting. Something I've learned through research—not in practice—is that metal can be porous if overheated. When melting with a torch, you don't really know how hot the metal is. Any casting I've done in the past was on a very small scale, and I probably just got lucky!

Incomplete casting

Incomplete casting

So I was ready to cast, and treed up some nine models. This time when I cast, I heated the sterling silver to about 1740°F (Kerr recommends going 100°F above the melting temperature of the metal, and silver is about 1640°F). I used the Formlabs castable resin burnout schedule, which clocks in at about 14 hours, landing on a 900°F casting temperature with a 3.5"x4" perforated flask. The result was not good!

But why?

After consulting Creative Side Jewelry Academy here in Austin, and the Formlabs forum, I found that it could be either the metal was not hot enough, or the flask was not hot enough. I found in another article that the flask can drop about 100°F in one minute in a vacuum caster, so it suggested making your flask temperature 100°F hotter. Also, filigree designs require a slightly hotter flask. The girl at Creative Side asked if I cast close to 1100°F, and I remember casting at or near that temperature in the past. Participants in the forum suggested between 900°F, or 950°F for filigree. Then the suggestion that every casting situation is different and these numbers are just guidelines, so it requires experimentation. 

Fast-forward two years later, and my settings now are this: flask temperature at the end is 975°F, and metal in my Kerr Electro-Melt is 1865°F.

So I set off to cast again. This time, I used two 2"x2.5" flasks, a 2.5"x2.5" flask, and a 2.5"x3" flask, each with three models, rather than trying to cast a tree with ten models (or more?). I also tried adding a forked sprue coming into the bezel on the back, and another configuration with four sprues coming to the back of the frame. On that one I also added two small sprues coming into the back of the bezel. The sprues on the back of the frame are very easy to clean up, but when I 3D printed this one, the different support configuration distorted the frame on the bottom.

I also conquered my fear of cleaning up the jewelry! I learned from the forum that I should try tumbling the pendants for longer (these were polished about 40 minutes on a rotary tumbler), and silicone wheels work well for cleaning up raw castings. So far I hadn't had much luck with them. So I busted out the kit and it worked!  I also tried these little wheels made with 3M micron finishing papers, and they worked well for grinding down the sprues from the back and finishing the back of the frame. And something surprising...the back of the pendant with a patina is as pretty as the back...so it's reversible. I'll have to play around more with that.

However, they were still usable, and became Christmas gifts! 

spruing and investing the wax models

So now I finally have something to cast! Time to start tearing through those unpacked boxes and find everything I need. Tongs, check! Torch, check! Casting investment, check-check!

Okay, I'm scared to death of this step. But time to bite the bullet and just do it.

Step 1: Add the Sprues

When you're creating a lost wax model, you need to add a "sprue," which creates a tube through which molten metal travels into the model cavity in the investment (like plaster of paris).

You'll want to weigh each model with a short sprue attached on a jeweler's scale, and make a note of the weight in GRAMS on a piece of paper. You'll use this to calculate the amount of metal needed.

If you're casting multiple items at the same time, you can make a "tree" of the separate models, connected with sprues to the button. 

The bottom base shown on the last photo will fit onto a metal flask, which is a large stainless tube.  

Next, spray the model with a light coat of debubblizer from about 12-18 inches away. Bubbles on the model will result in little bumps...you want to avoid them at all costs!

Using thin plastic, such as transparency material, create a "collar" at the top of the flask to contain the investment.

Step 2: Mix the Investment

The next step is to mix the investment, using the casting machine's vacuum chamber to remove any bubbles from the investment.

Using tables provided by the manufacturer of the investment, you carefully mix dry investment with cool water in a rubber mixing bowl. With plaster, you always add the dry plaster to water, and allow the water to seep into the dry mix...a process called "slaking." After the investment has absorbed water, you can start to mix. Kerr, the manufacturer of the investment, recommends mixing for about 3-1/2 minutes. I didn't go that long.

Step 3: Remove the Bubbles by Vacuuming

My first casting kit recommended tapping the side of the bowl to remove bubbles, but the Kaya-Cast has a vacuum chamber that lowers the pressure, causing the investment to "boil." Kerr recommends that once the investment starts to boil, vacuum an additional 20 seconds more. When the pressure is released, the bubbles disappear!

Step 4: Pour the Investment in the Flask and Vacuum Again

Carefully pour the investment down the side of the flask, never on the model itself. The investment will fill around the model from the bottom, which will help push any air bubbles to the top. Make sure that the investment is slightly below the top of the flask.

Place the flask in the vacuum chamber again, and vacuum up to 90 seconds. 

In the video, you'll notice that the sound of the vacuum is different. The bell jar was not sealing completely with the silicone pad. Pressing down on the jar fixed the problem, and since only a few seconds elapsed, I didn't have to adjust the time.

Step 5: Let the Investment Set

The next step is to let the investment set for about two hours. Once the investment has hardened, remove the collar, clean the top with a putty knife, making sure that the investment is slightly below the top edge of the flask.

Step 6: Removing the Rubber Base

Carefully twist (if possible) the rubber base, and remove it. If you can't twist it—these little suckers are pretty tight—pull one edge slightly away from the flask, then twist. It should come off. Inspect the hole to make sure that there isn't any debris.

If bits of investment get into the hole, they can become lodged in the molten metal and ruin your piece.

Step 7: Burn Out the Wax

Turn the flask upside down, and place on a metal screened based that's used for collecting wax and protecting your kiln. Using a kiln and the recommended burnout schedule from the investment manufacturer, burn out the wax. If you're using SatinCast from Kerr, the schedules are located here, or see the graphic below.

Since my flasks were 2"x2.5", 2.5"x2.5", and 2.5"x3", I should have used the five-hour burnout schedule. Larger flasks require longer burnouts. Since one of my flasks was larger than the 2.5"x2.5" limit for the 5-hour schedule, I went up to the 8-hour schedule. I probably could've done fine with the shorter schedule, or adjusted it a little longer.

I also saw that there was a large range of casting temperatures, which varies depending on the type of metal and the type of design. I was casting sterling silver from Rio Grande, which has a recommended range of 800-1200°F (427°C-649°C). I did read that centrifugal casting machines will generally cast at a higher temperature, and I know that a local studio casts at 900°F (482°C) with their centrifugal machine. There can also be problems with the quality of your casting if you cast too hot. So I chose to cast at 900°F.

So the final stage of your burnout cycle is to hold the flask at the casting temperature, which in this case was one hour at 900°F (482°C).

Kerr's recommended burnout cycle

Step 8: Calculate the Amount of Metal

Take the weight from Step 1 and make the following calculations:

  1. Add 10% for the button. Multiply the weight (or total weight of multiple pieces) x 1.1.

  2. Take the new amount, and multiple by the specific gravity of the metai you're casting. Silver is 10.36, but generally rounded up to 10.4.

  3. This is the weight in grams of your metal.

  4. Divide this number in half. You'll need at least 50% NEW metal (casting grain) and the other 50% can be scrap. Set the metal aside. Repeat for each flask.

  5. Turn on the scale, change mode to GRAMS. Place a small container on the scale and press the TARE button to zero out the scale. Add the casting grain first, and make sure that you have at least 50%. Add the rest of the scrap until you reach the total number needed.

Next...we'll cast!