I’m pleased to let everyone know that here shortly I’ll be introducing my new full-length ZBrush jewelry course at www.zbrushjewelry.com. If you’re interested in being notified when I go live, sign up here.

cost of printing @ Shapeways
I had a really great question from a viewer on my YouTube channel yesterday on the flower eternity band tutorial—how much would it cost to have the ring printed and cast? There are several factors that can affect the overall cost, like the thickness of the band and the type of metal. I wear a similar band to this one, and mine is 1.5mm in thickness and it has never bent out of shape.
I’d only sent models out to Shapeways very early in my ZBrush exploration, and even then I’d only had waxes made. So I had no idea what the answer to this question was…so I created a new ring and got it ready for Shapeways. Mind you, there are other great services out there, but Shapeways has a large variety of materials available.
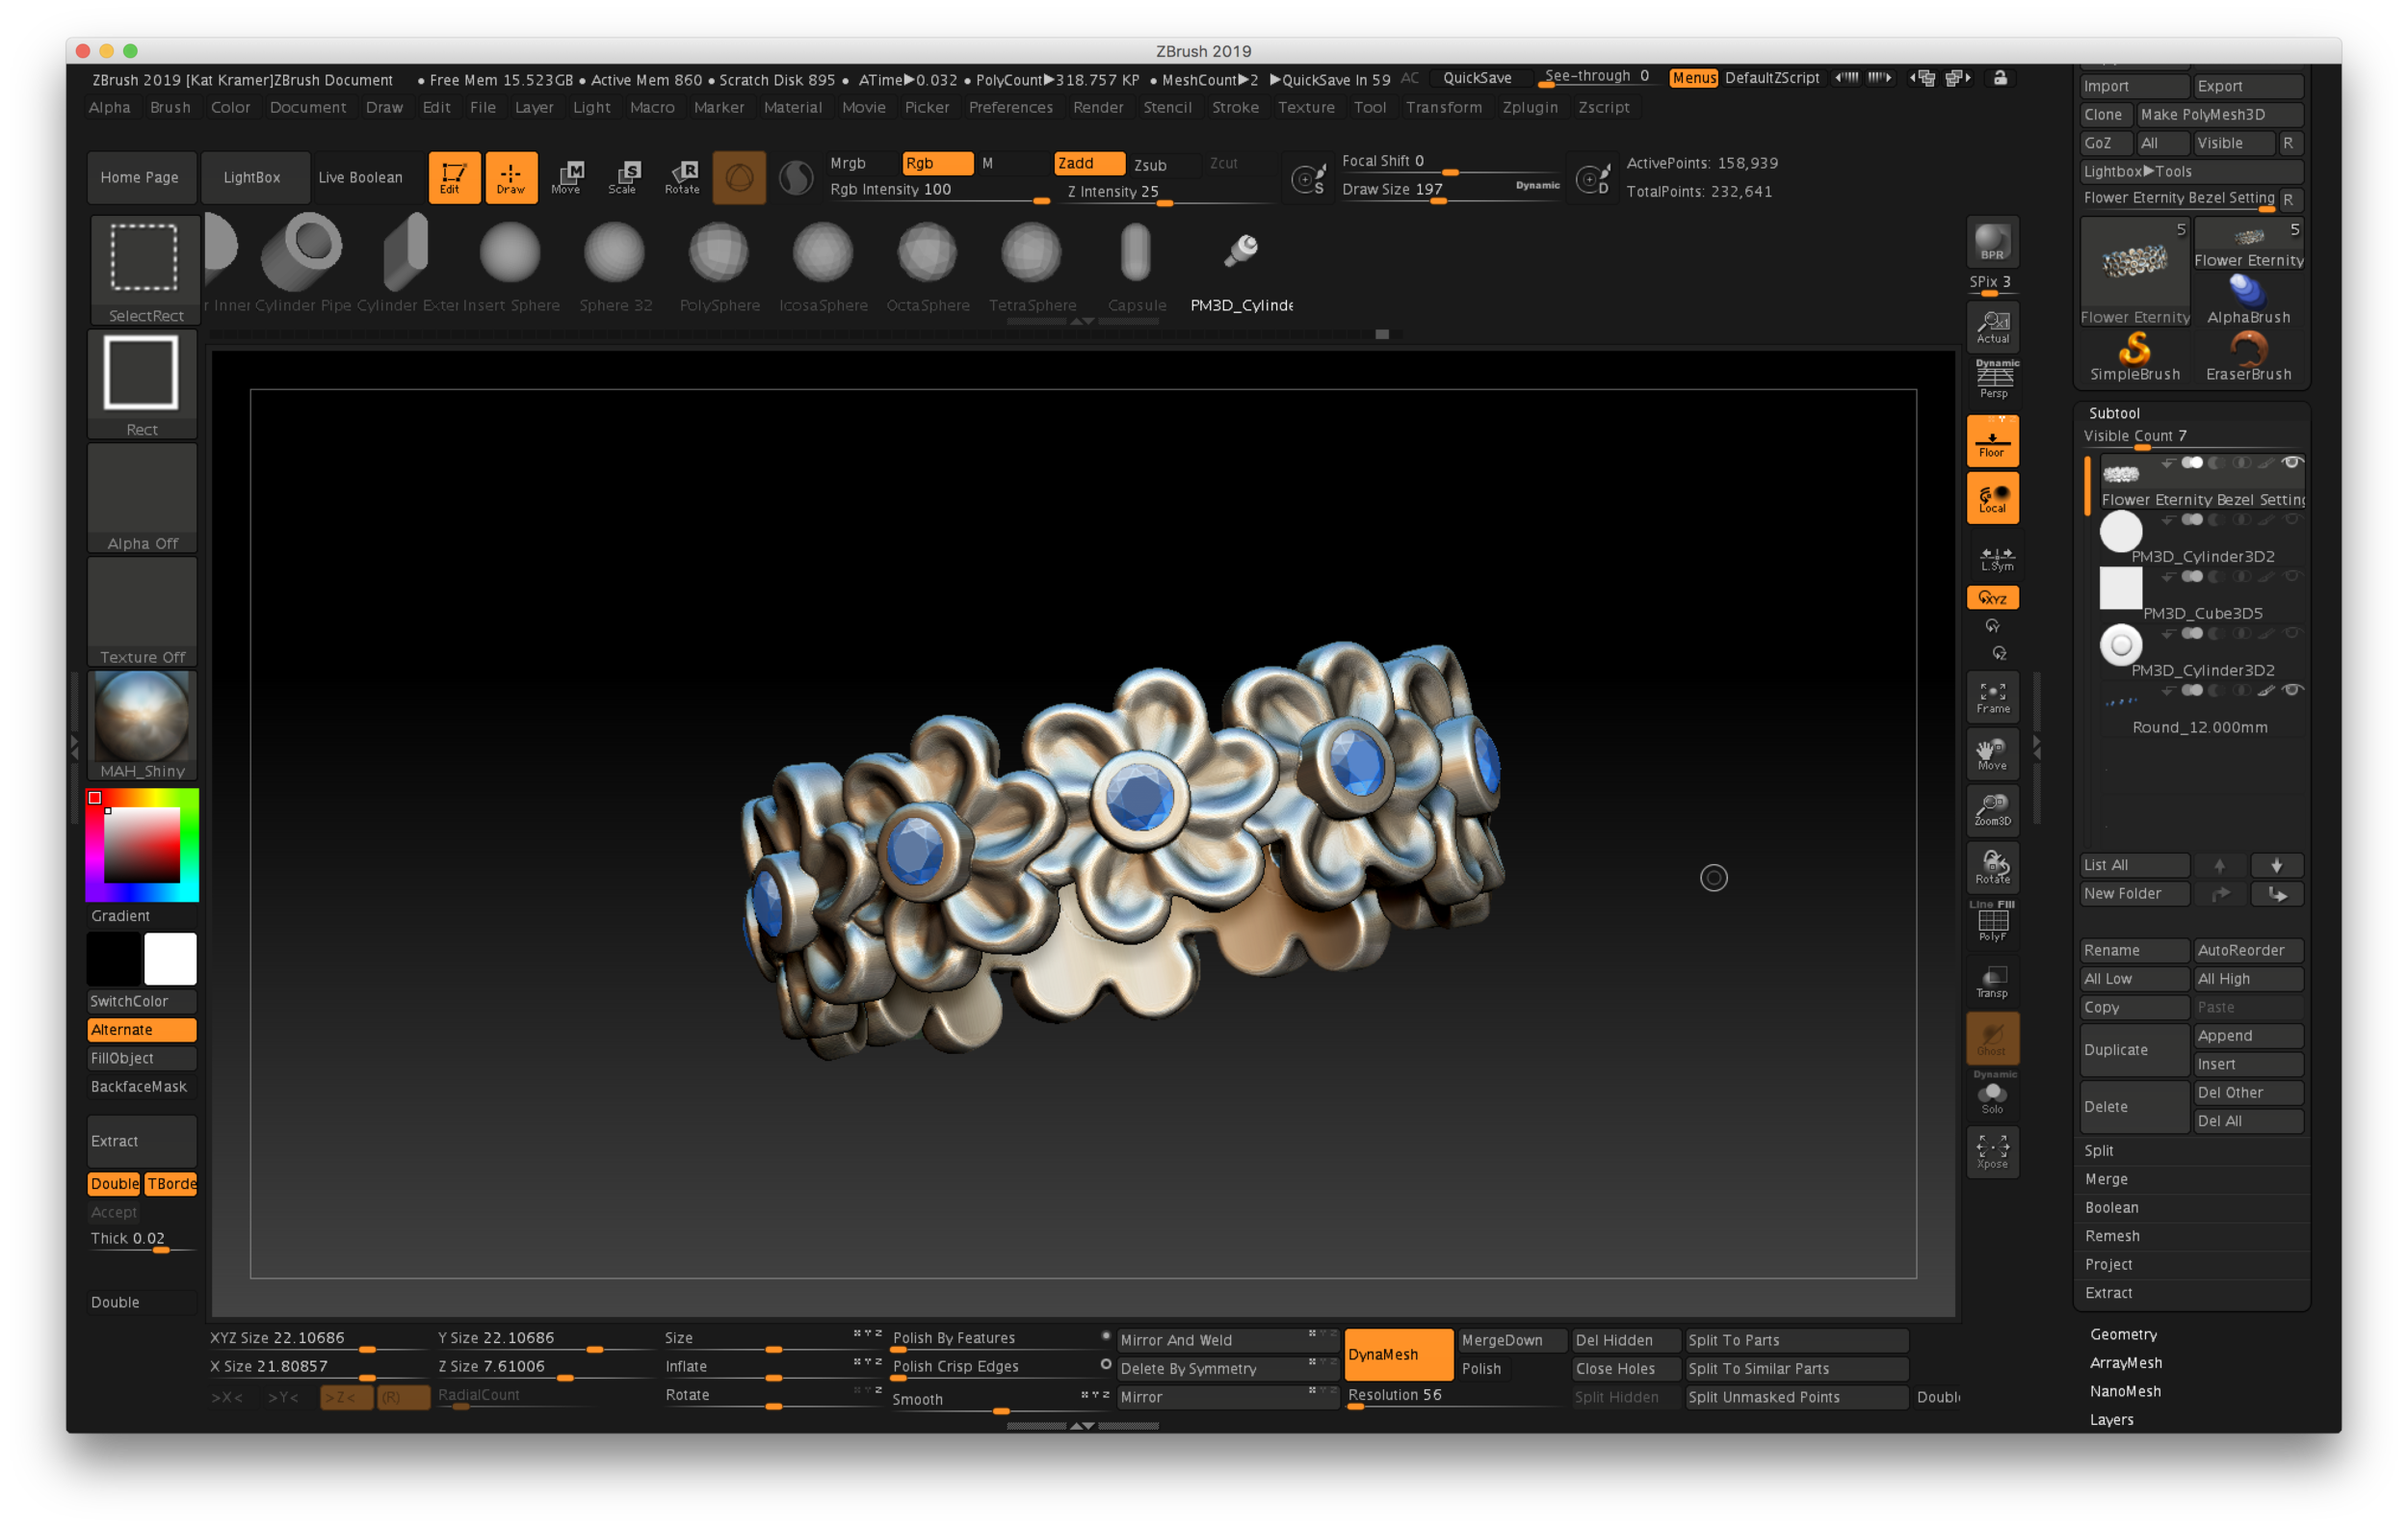
I decided to add a bezel setting to mine with a hole that’s smaller than the stone. I’ll use setting burs and a hammer handset on my Foredom to bezel set the stones. Creating a bezel with a smaller hole gives me flexibility on my stone size. Here are a couple photos of the model in ZBrush:
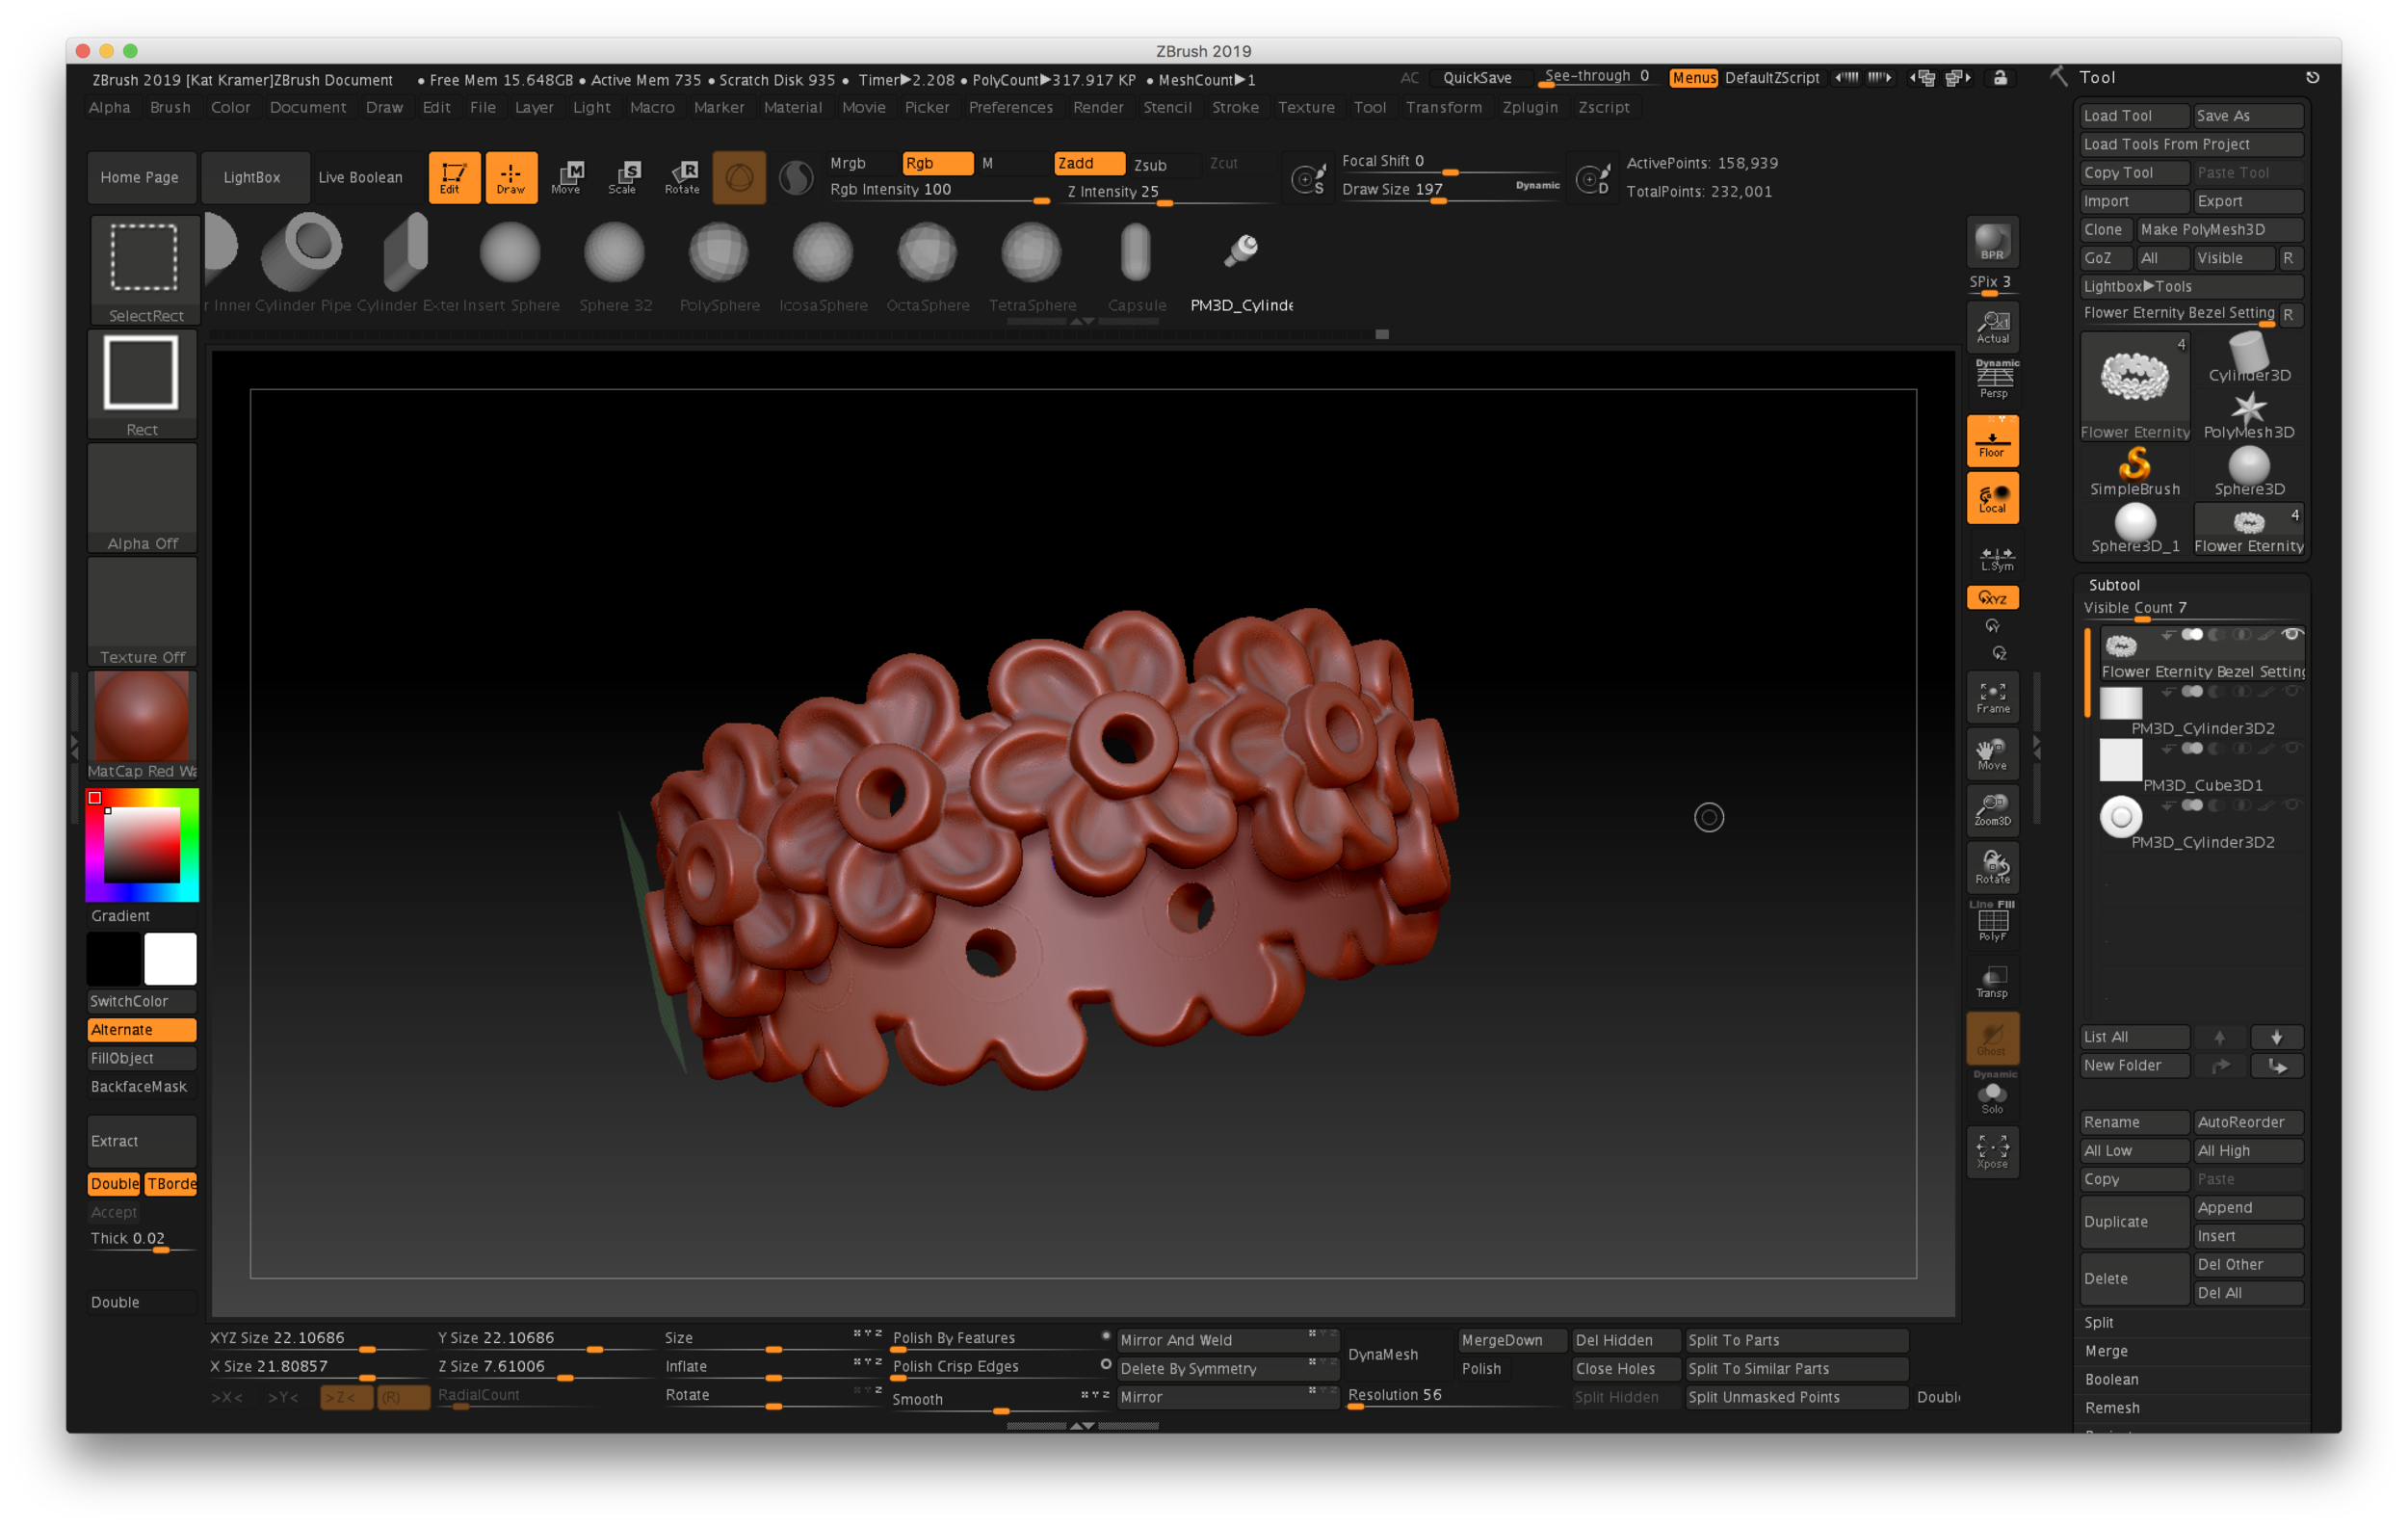
After creating the ring and resizing it to the desired thickness and ring size, I used Decimation Master to lower the overall file size and simplify the mesh. My ring is around a women’s size 8 US.
Make sure that the model you want to export is all in one Subtool—in my model, I had both the bezels and the flower band which needed to be permanently merged. I used Merge Down and re-Dynamesh to an appropriate resolution, which for full-sized rings in the method I use is a resolution of around 56-80. Then I went to the Plugins menu, and located Decimation Master. I always make a mental note of the ActivePoints above the canvas. Mine started out around 780,000 points.
This process has two steps…because you’re only exporting one Subtool, you only need to use Pre-process Current. That step will take a little bit of time, depending on the size of your model and number of ActivePoints. Once you’re done, the ActivePoint count will not change.
Special note about those ActivePoints: I tend to work with models that are a million points or lower…some artists have high-end hardware and love to work in the 12-20 million point range, but since I primarily work on a MacBook, and I hate waiting for my computer to process things, I learned how to work in lower resolutions.
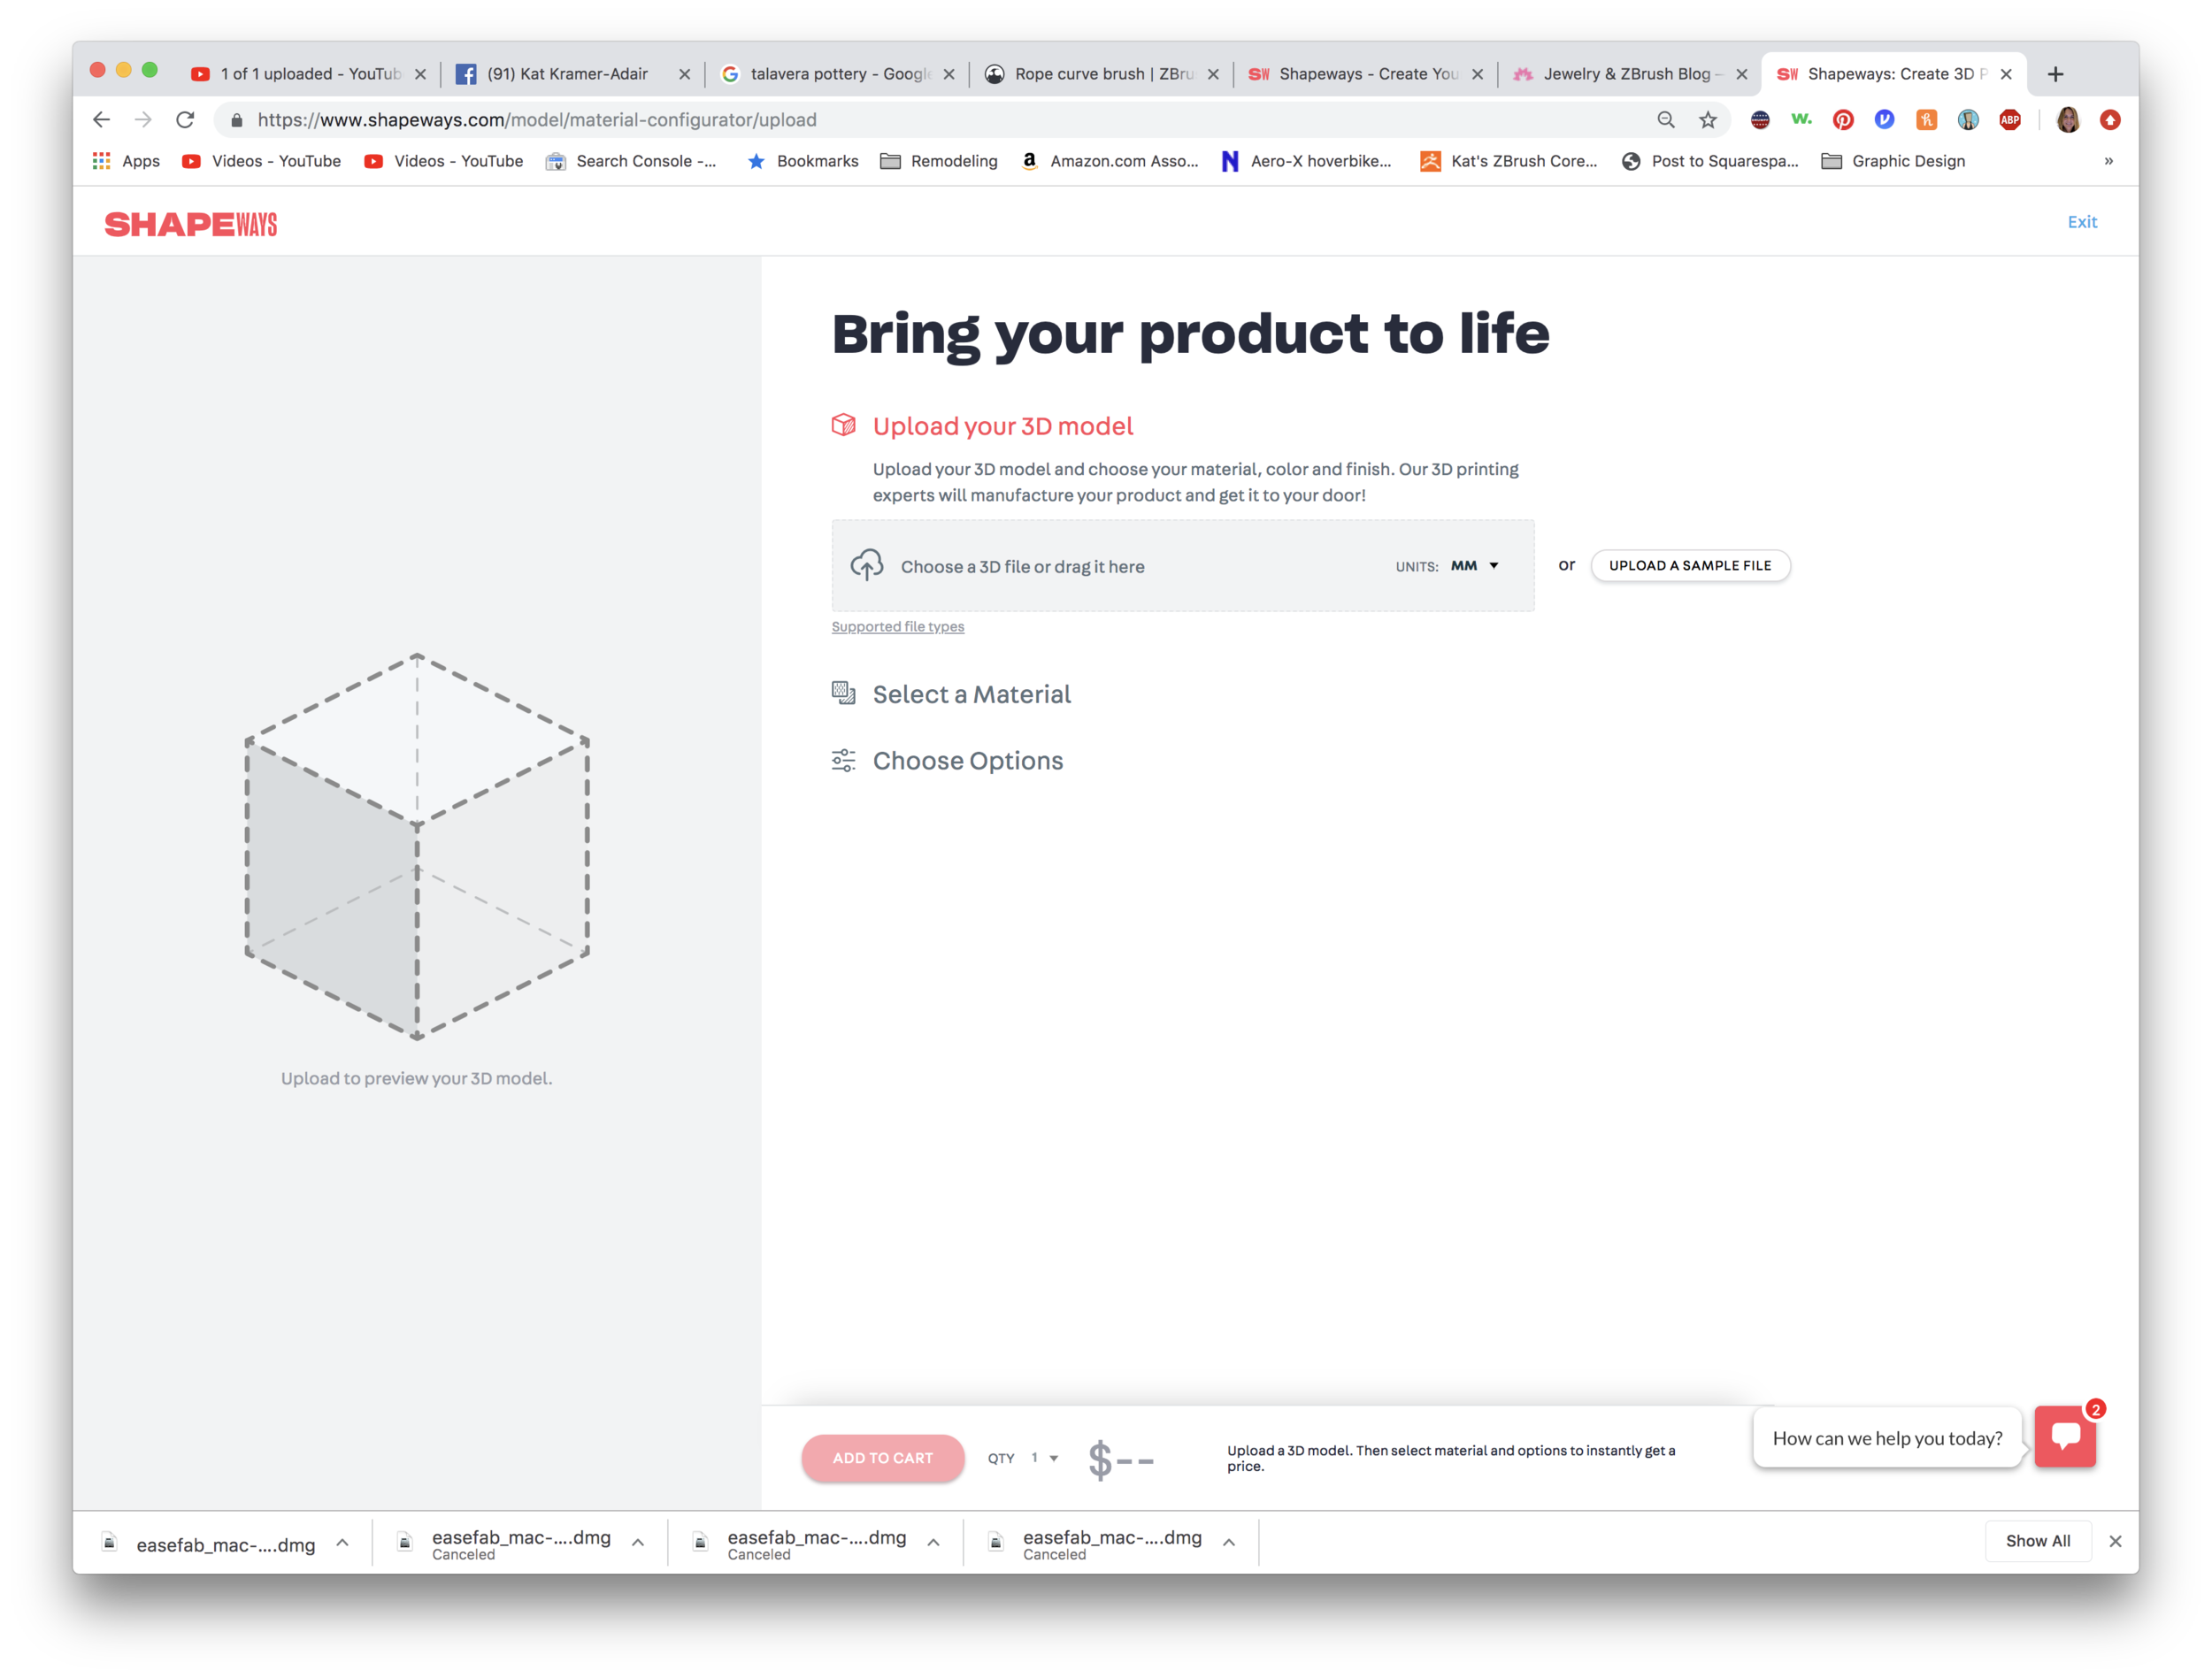
The second step is to Decimate Current, and this is when you will see a change in the ActivePoints. Once the operation was complete on my model, the ActivePoint count dropped down to 158,000, which is a smaller, more efficient file. It’s easily uploaded to Shapeways by using the Export command in the Tool palette.
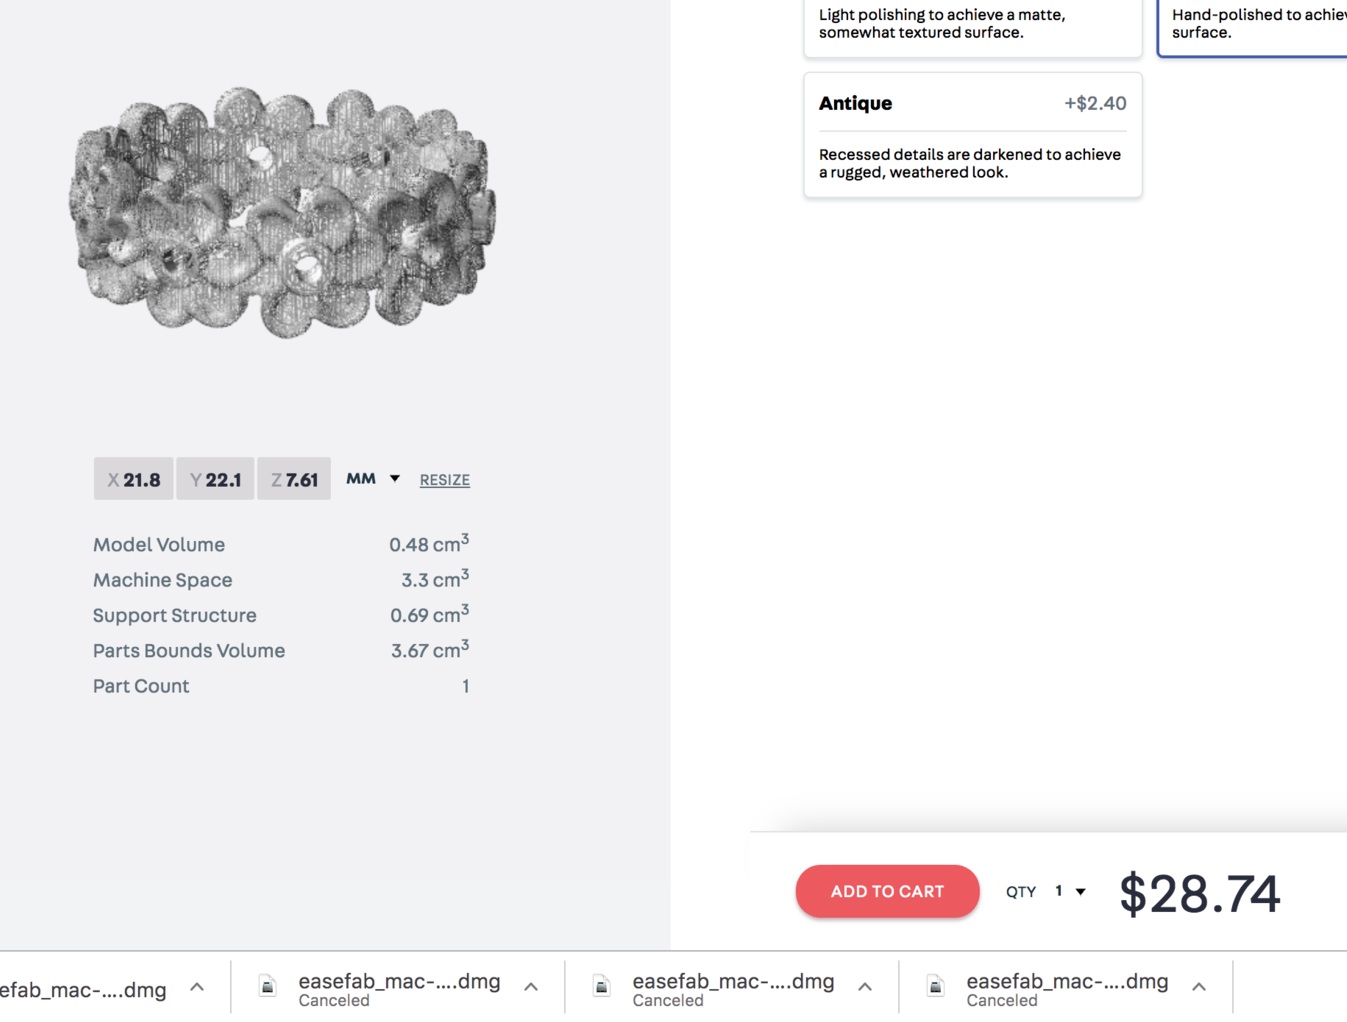
It looks like Shapeways has recently changed their landing page, so you can quickly upload a model and select a metal preference. You can also choose the type of finishing—rough, polished, or finely polished. There is an upcharge for those extras, though.
So the answer to the question if I were printing this design would be about $24-35 to print in sterling silver. Although I love wearing this ring so much I’d happily shell out $283 for a gold version!

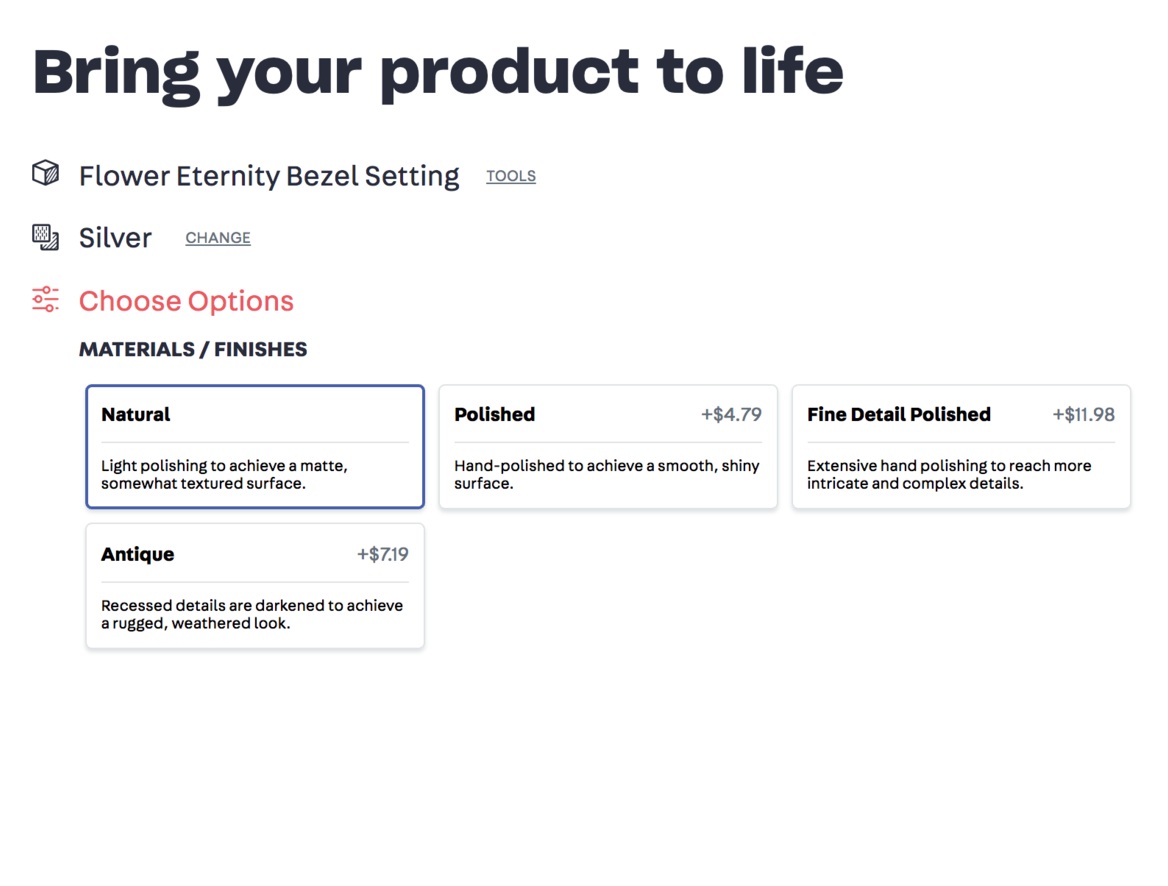
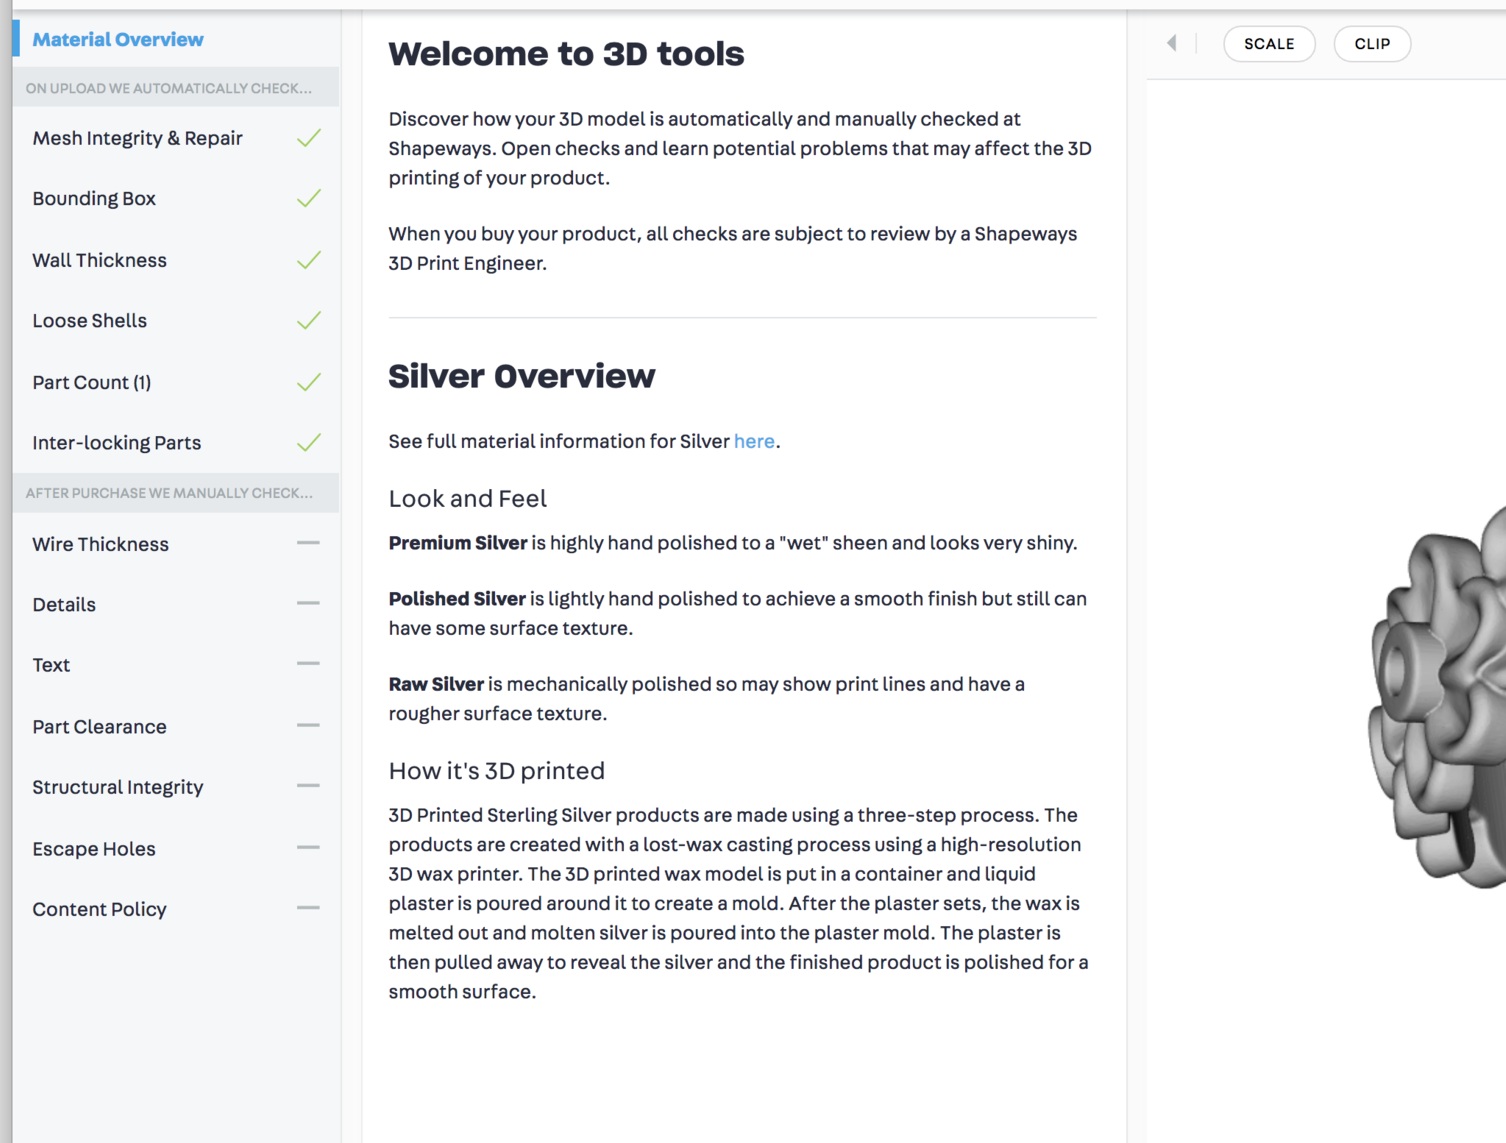
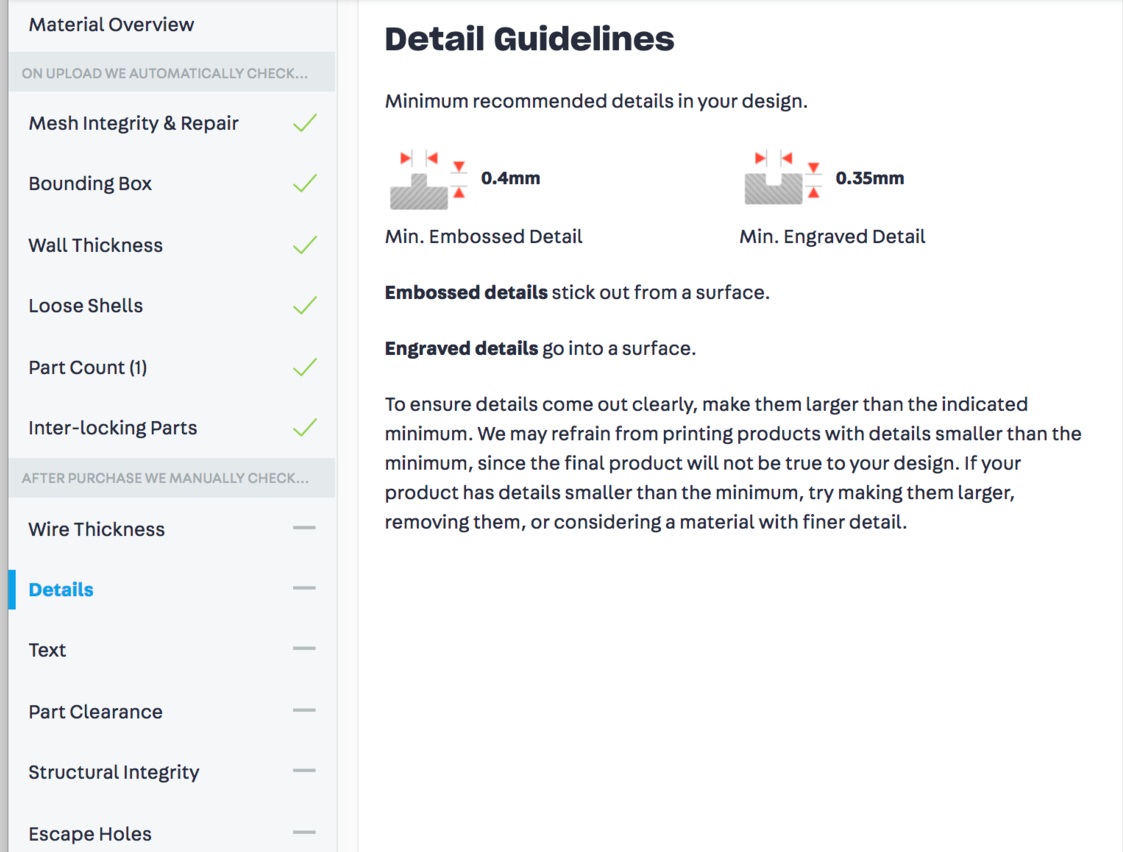
Also, there is another tool available. See below where it says TOOLS next to the title “Flower Eternity Bezel Setting?” If you click on that you’re directed to a 3D Tools page that will evaluate your model, and give information about the materials and printing.
Check out the images below, or you can click here to see the model for yourself!
another huichol test video
So I just ran a test last night on creating a Huichol beading tutorial using my iPad Pro with Apple Pencil, Adobe’s Illustrator Draw program to create the bead grid, Recolor, a coloring app, to color the beads, and AutoCAD Sketchbook to animate the thread path. It shows promise!
I don’t thing the text with the bead colors is necessary, but I’m looking for a way to incorporate the colors into the video. Perhaps having a “sliver” of the pattern at the bottom while showing the thread path at the top.
I’ve always wanted to know how to do the leaves that are commonly used in Huichol bracelets and those amazing necklaces…now to show that to others! Stay tuned…

Picture of Fordite (automotive paint), image via flickr user nebbie
applying a custom texture in ZBrush
I like designing fabricated or cast jewelry with custom glass cabochons, which can be done pretty easily in ZBrush.
After creating your pendant through whatever means you’d like…sculpting, hard surface modeling, the easiest method is to create a separate subtool that represents the stone. It can also be done with a separate polygroup, but my preference is the separate stone which can be duplicated and different cabs tested.
In the image above, the first piece features a cabochon created from a pâte de verre (glass paste) test tile from the fabulous Alicia Lomne’s class I took last October. The second example is a slab of fused glass that I created a few years back that I cut into cabochons, and the final one is a piece of Fordite. Never heard of Fordite? It’s a manmade “stone” from the drippings of automotive paint from factories, and it is sparkly and beeeautiful! You can actually tell the “vintage” by the colors of paint in the layers; for example, a piece of Fordite from the 1970s will look totally different than a chunk from the early 2000s.
Anyway, your setting for your stone can be as simple as a bezel from one of my bezel tutorials, and create the matching cabochon. I’ll make a video tutorial here shortly to make the pendant above, which was made using the Project Primitive tool, which can be found above the Gizmo 3D in the Move mode.

Moving on…the key here is to apply a material to all subtools before you begin. While in the Draw mode, choose the M button to the left of ZAdd. This enables your material channel. Next, choose MAHmc_Shiny from the Materials picker on the left, then from the Color menu, choose FillObject. If you’ve loaded my custom interface, there is a button on the left under the color pickers for this function.
Now go to the cabochon subtool, and pick a material such as SketchShaded3, then click the FillObject button again. This will assign the material to the cab before we load the texture, giving you a clean slate.

Now, switch to the Rgb channel. Go to the Texture picker on the left side of the canvas. Choose Import at the bottom, and load your texture.
Choose a brush that you don’t use often—I use the Clay brush since I usually use ClayBuildup if I’m sculpting.
Switch FocalShift to -100, which will prevent the texture from being blended around the edges.
Choose DragRect from the Stroke menu, which will allow you to click on the model and drag to resize the texture.
Make sure that the desired texture is loaded under the Texture selector.
Click on the cab and drag to apply the texture. You can resize and rotate as needed.
To view your piece in all its glory, Choose Best from the Render menu. If you’d like to save the image, go to the Document menu and choose Export.
If you’d like to try different cabochon styles, duplicate the cab under the Subtool palette. Use visibility to turn the different cabs on and off, then export each one.
ZBrush pendant with labradorite cabochon; stone image applied as texture
If you’re a graphic designer and want to place your pendant on an alternate background like the image above, you’ll use a “mask” to block out the background in ZBrush. To create a mask, use the BPR render button on the upper right-hand corner of the canvas, then go to the Render menu, look for BPR RenderPass, and look for BPR Mask…click the button and name the file “[whatevername}_mask.psd. Immediately after generating the mast, make sure it’s set for a “Best” render under the Render menu, then export the image again. If you’re unfamiliar with how to use a mask in Photoshop, do a quick search online for “Using alpha channels in Photoshop.” This will allow you to have a version of your ZBrush jewelry without a background, ready to insert into a custom background.
I’ll get a video up shortly that has this technique, but hopefully this will point you in the right direction for adding cool textures! Try it with veined turquoise or a Mexican Agate, just for fun…

Same texture applied in a different orientation on a pair of earrings
(2) Ocean Jasper cab image from eBay seller waly-beads.
(3) Crazy Lace Agate image from Silverhawk’s Designer Gemstones.
(5) Ocean Jasper from MagicStones on Etsy
more huichol, please!
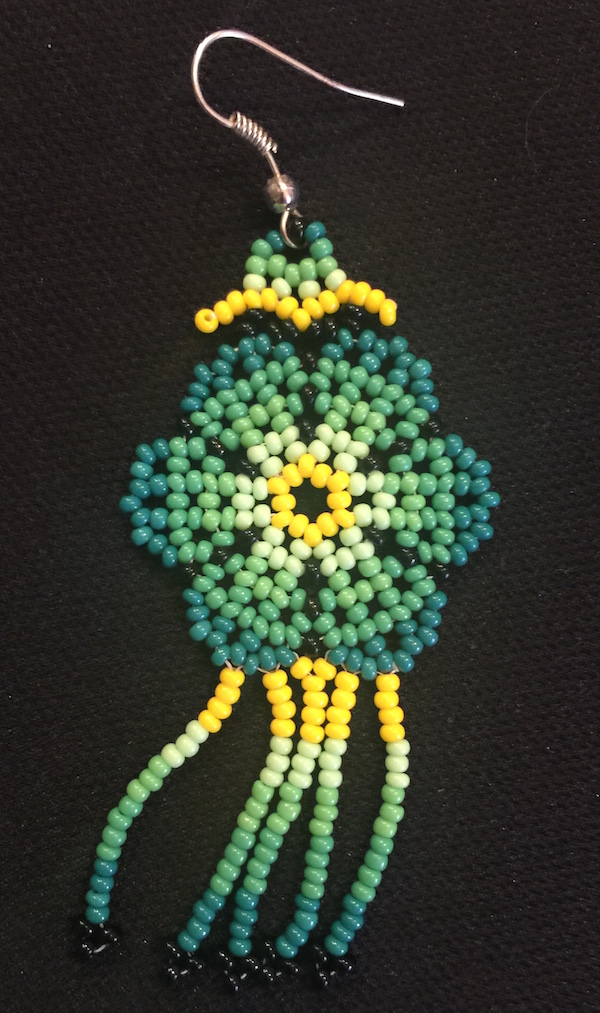
Yes, it's time for another Huichol beading project!
This time we're going to learn how to create a simple Huichol-style flower earring or pendant. You'll need some Preciosa beads like the ones found in my other Huichol tutorial here, in several colors. The tutorial is done in shades of yellow, orange and pink, with a little green loop at the top. (The flower shown here is just a placeholder).
Just a reminder, the tutorial and images are copyrighted. If you are interested in using them for a club or class, please contact me for permission.
You can follow along with my colors, or use the worksheet to design your own. Click here to download a PDF version that can be easily printed.
Click this link to start learning how to create these pretty and easy little earrings!
finally casting...the mandala pendants
UPDATE, December 2017: Looking back at this post, there are so many things that are wrong! Anyway, a good exploration of what works and what doesn't, and modifying a design to cast and finish more easily. The main change I eventually made to this pendant is to attach the design to a backplate, so the design is simply raised from a background. With a patina, the design is similar but much easier to cast and finish. I have since scrapped this design and melted them all down. So maybe they'll be collector's items someday! And oh my goodness…thankfully my design skills have come a long way. I’ll leave this post up, though, just in case others are having the same issues.
Well, it's finally time. What better time to start casting holiday gifts than a week before Christmas?
It's been an interesting journey. It started back in Denver after I got the casting setup...I remember that my first attempt at casting with a perforated flask, I ran out of acetylene at 1 a.m. and didn't have a way to heat enough metal to cast. The second attempt, I realized that my acetylene/ambient air torch couldn't heat enough metal hot enough to cast. After switching to my old Smith Little Torch (acetylene/oxygen) with a "bud tip," I was able to get the metal melted, but never cast before we suddenly moved back to Texas.
Fast forward over a year. Since then I've taken the wax-working class with Kate Wolf, learned ZBrush, and explored printing in 3D on the Formlabs Form 2. I've printed a lot of things, but the missing link was casting them into metal jewelry.
So I was ready to go! Treed up some models, was burning them out, and my kiln fell victim to the outdoor sprinkler. Since I work late at night usually, I didn't realize that the sprinkler was scheduled to water the lawn that night. The kiln was sitting on a little window in the outdoor kitchen burning out my first 3D model flask, and a poorly aimed sprinkler doused the kiln and killed it. I awoke to an error message and a flask that hadn't completed burnout. I was crushed.
So what do you do when your Paragon SC2 kiln has been watered? Let it sit for a few days and let it dry out. Since this kiln has a metal cabinet, I removed the back and aimed the fan on the inside. Sure enough, about four days later I had the guts to turn it back on. It worked.
Next, I was ready to cast the 3D prints. I prepared the trees, the flask, and tried casting again. I was still having difficulty getting the metal heated correctly. About that time I was helping my parents downsize their house, and my dad gave me a little present...the Kerr Electro-Melt that I needed to get the metal to the right temperature for casting. Something I've learned through research—not in practice—is that metal can be porous if overheated. When melting with a torch, you don't really know how hot the metal is. Any casting I've done in the past was on a very small scale, and I probably just got lucky!

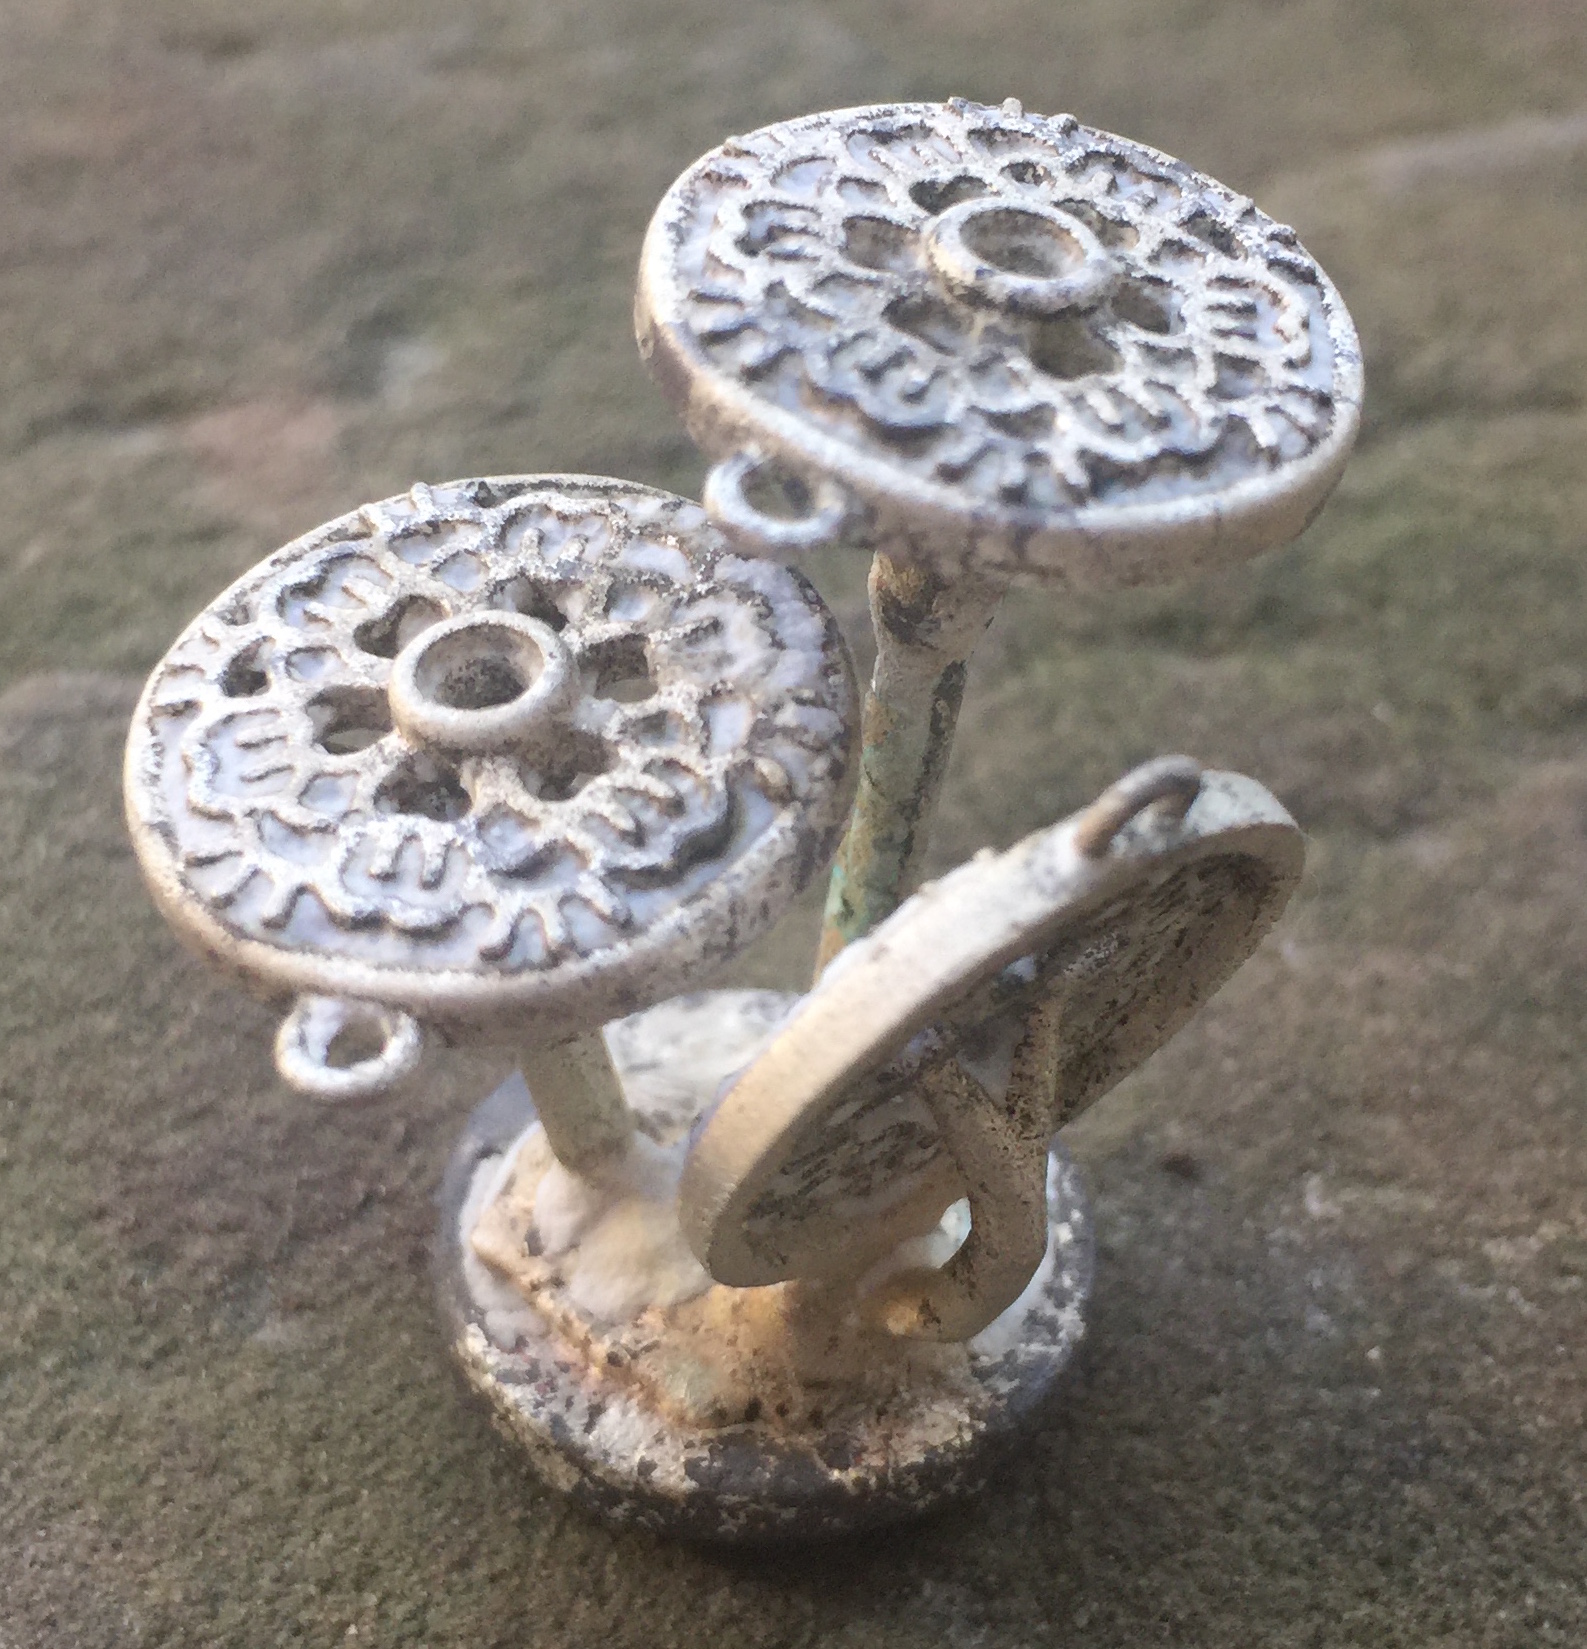
Incomplete casting
So I was ready to cast, and treed up some nine models. This time when I cast, I heated the sterling silver to about 1740°F (Kerr recommends going 100°F above the melting temperature of the metal, and silver is about 1640°F). I used the Formlabs castable resin burnout schedule, which clocks in at about 14 hours, landing on a 900°F casting temperature with a 3.5"x4" perforated flask. The result was not good!
But why?
After consulting Creative Side Jewelry Academy here in Austin, and the Formlabs forum, I found that it could be either the metal was not hot enough, or the flask was not hot enough. I found in another article that the flask can drop about 100°F in one minute in a vacuum caster, so it suggested making your flask temperature 100°F hotter. Also, filigree designs require a slightly hotter flask. The girl at Creative Side asked if I cast close to 1100°F, and I remember casting at or near that temperature in the past. Participants in the forum suggested between 900°F, or 950°F for filigree. Then the suggestion that every casting situation is different and these numbers are just guidelines, so it requires experimentation.
Fast-forward two years later, and my settings now are this: flask temperature at the end is 975°F, and metal in my Kerr Electro-Melt is 1865°F.

So I set off to cast again. This time, I used two 2"x2.5" flasks, a 2.5"x2.5" flask, and a 2.5"x3" flask, each with three models, rather than trying to cast a tree with ten models (or more?). I also tried adding a forked sprue coming into the bezel on the back, and another configuration with four sprues coming to the back of the frame. On that one I also added two small sprues coming into the back of the bezel. The sprues on the back of the frame are very easy to clean up, but when I 3D printed this one, the different support configuration distorted the frame on the bottom.
I also conquered my fear of cleaning up the jewelry! I learned from the forum that I should try tumbling the pendants for longer (these were polished about 40 minutes on a rotary tumbler), and silicone wheels work well for cleaning up raw castings. So far I hadn't had much luck with them. So I busted out the kit and it worked! I also tried these little wheels made with 3M micron finishing papers, and they worked well for grinding down the sprues from the back and finishing the back of the frame. And something surprising...the back of the pendant with a patina is as pretty as the back...so it's reversible. I'll have to play around more with that.
However, they were still usable, and became Christmas gifts!